
Invoices
Invoices still in Beta
To get access, sign in to your PayMongo Dashboard and join the beta from there. You should expect the current access path to start with beta enrollment in the dashboard rather than a standard public rollout.
Use PayMongo Invoices to professionally bill your customers, track outstanding payments, and get paid, all from your dashboard.
Invoices is a product that was built for merchants who need to send itemized bills to specific customers and follow up on payment against a due date. Each invoice generates a hosted payment page where your customer can review the breakdown and pay using the payment methods you've enabled on your account. When they click Pay, they're taken through a Checkout Session, the same payment engine used across all PayMongo Payment Channels.
Unlike Payment Links, which are best for quick one-off collection, Invoices gives you line-item detail, customer records, due dates, and a full status lifecycle, making it easier to manage billing across multiple customers and transactions.
When to Use
Choose Invoices when you need to send a detailed bill to a specific customer and track it to completion.
Invoices is a good fit when you:
- Bill clients for services, projects, or orders with multiple line items
- Need to set and track a payment due date
- Want a professional billing document you can send via email or a shareable link
- Need to maintain clear payment records per customer
Choose Payment Links instead when you need to collect a quick, one-time payment without line-item detail or due dates.
How it Works
When you create and send an invoice, your customer receives a hosted payment page showing the invoice details, line items, amounts, due date, and your message to them. When they're ready to settle their invoice, they get redirected to checkout where they can select a payment method and complete payment. Once payment is confirmed, the invoice status updates automatically in your dashboard.
Concepts
Invoice, the payment request you create and send to a customer. Each invoice is a distinct record in your PayMongo account, separate from the payment itself.
Invoice number, a unique identifier for each invoice. You can customize the format or let PayMongo generate one automatically.
Line items, the individual products or services being billed. Each line item has a name, quantity, and unit price. PayMongo calculates subtotals and totals automatically.
Discount, a fixed-amount reduction applied to the invoice subtotal. Whole numbers only; percentage discounts are not supported at this time.
Invoice status, the current state of an invoice. Statuses update automatically as your customer acts on the invoice or as the due date passes:
| Status | What it means |
|---|---|
| draft | Created but not yet sent or shared. Still editable. |
| Awaiting payment | Sent or shared, waiting to be paid. |
| paid | Payment completed. |
| overdue | Due date has passed, still unpaid. |
| void | Cancelled. No longer payable. |
Before You Start
You'll need:
- An activated PayMongo merchant account with a Closed-loop wallet, which is automatically activated once you've completed KYC. Check your wallet status at Money Movement → Wallets.
- At least one payment method enabled on your account. Invoices reflect whichever methods are active on your account, you can also toggle individual methods per invoice.
How to Use
-
Create an Invoice
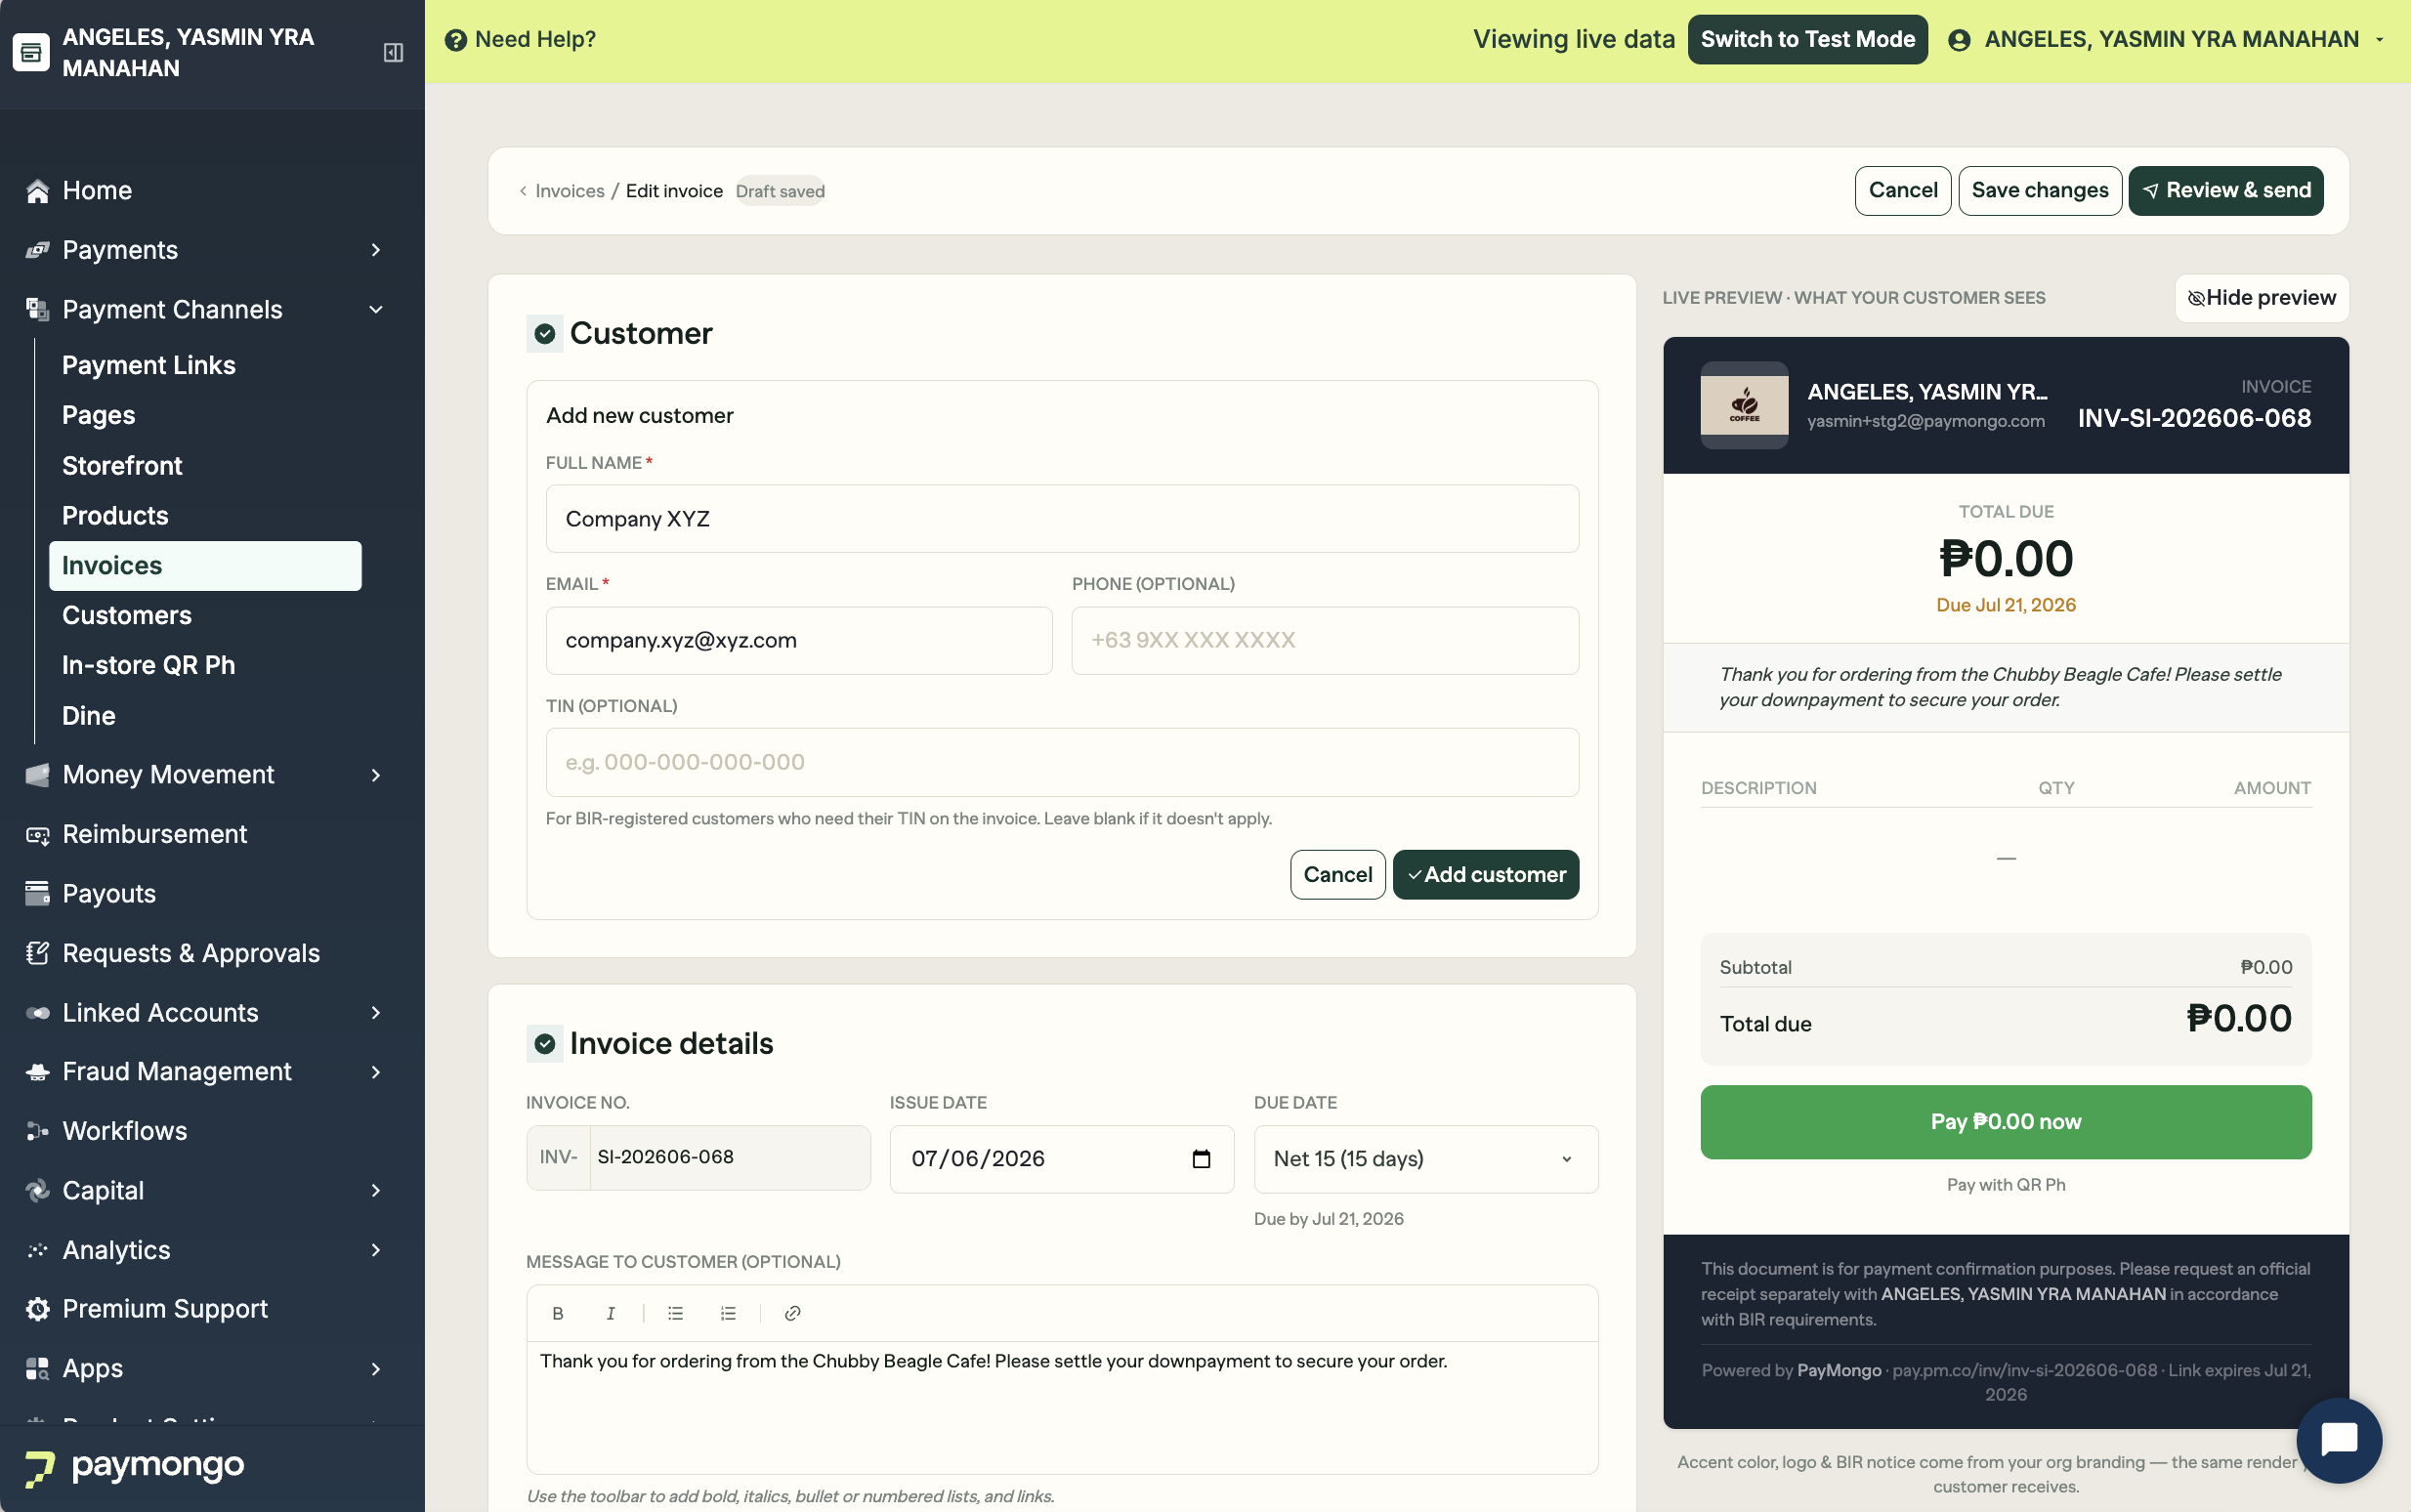
Go to Payment Channels → Invoices in your dashboard and click the "+ New Invoice" button. Fill in the following:
-
Customer details, Name, email address, and optionally a mobile number. The email address is where the invoice will be sent.
-
Invoice details, Customize the invoice number, set an issue date and due date, add a message to your customer (visible on the invoice), and add internal notes (not visible to the customer).
-
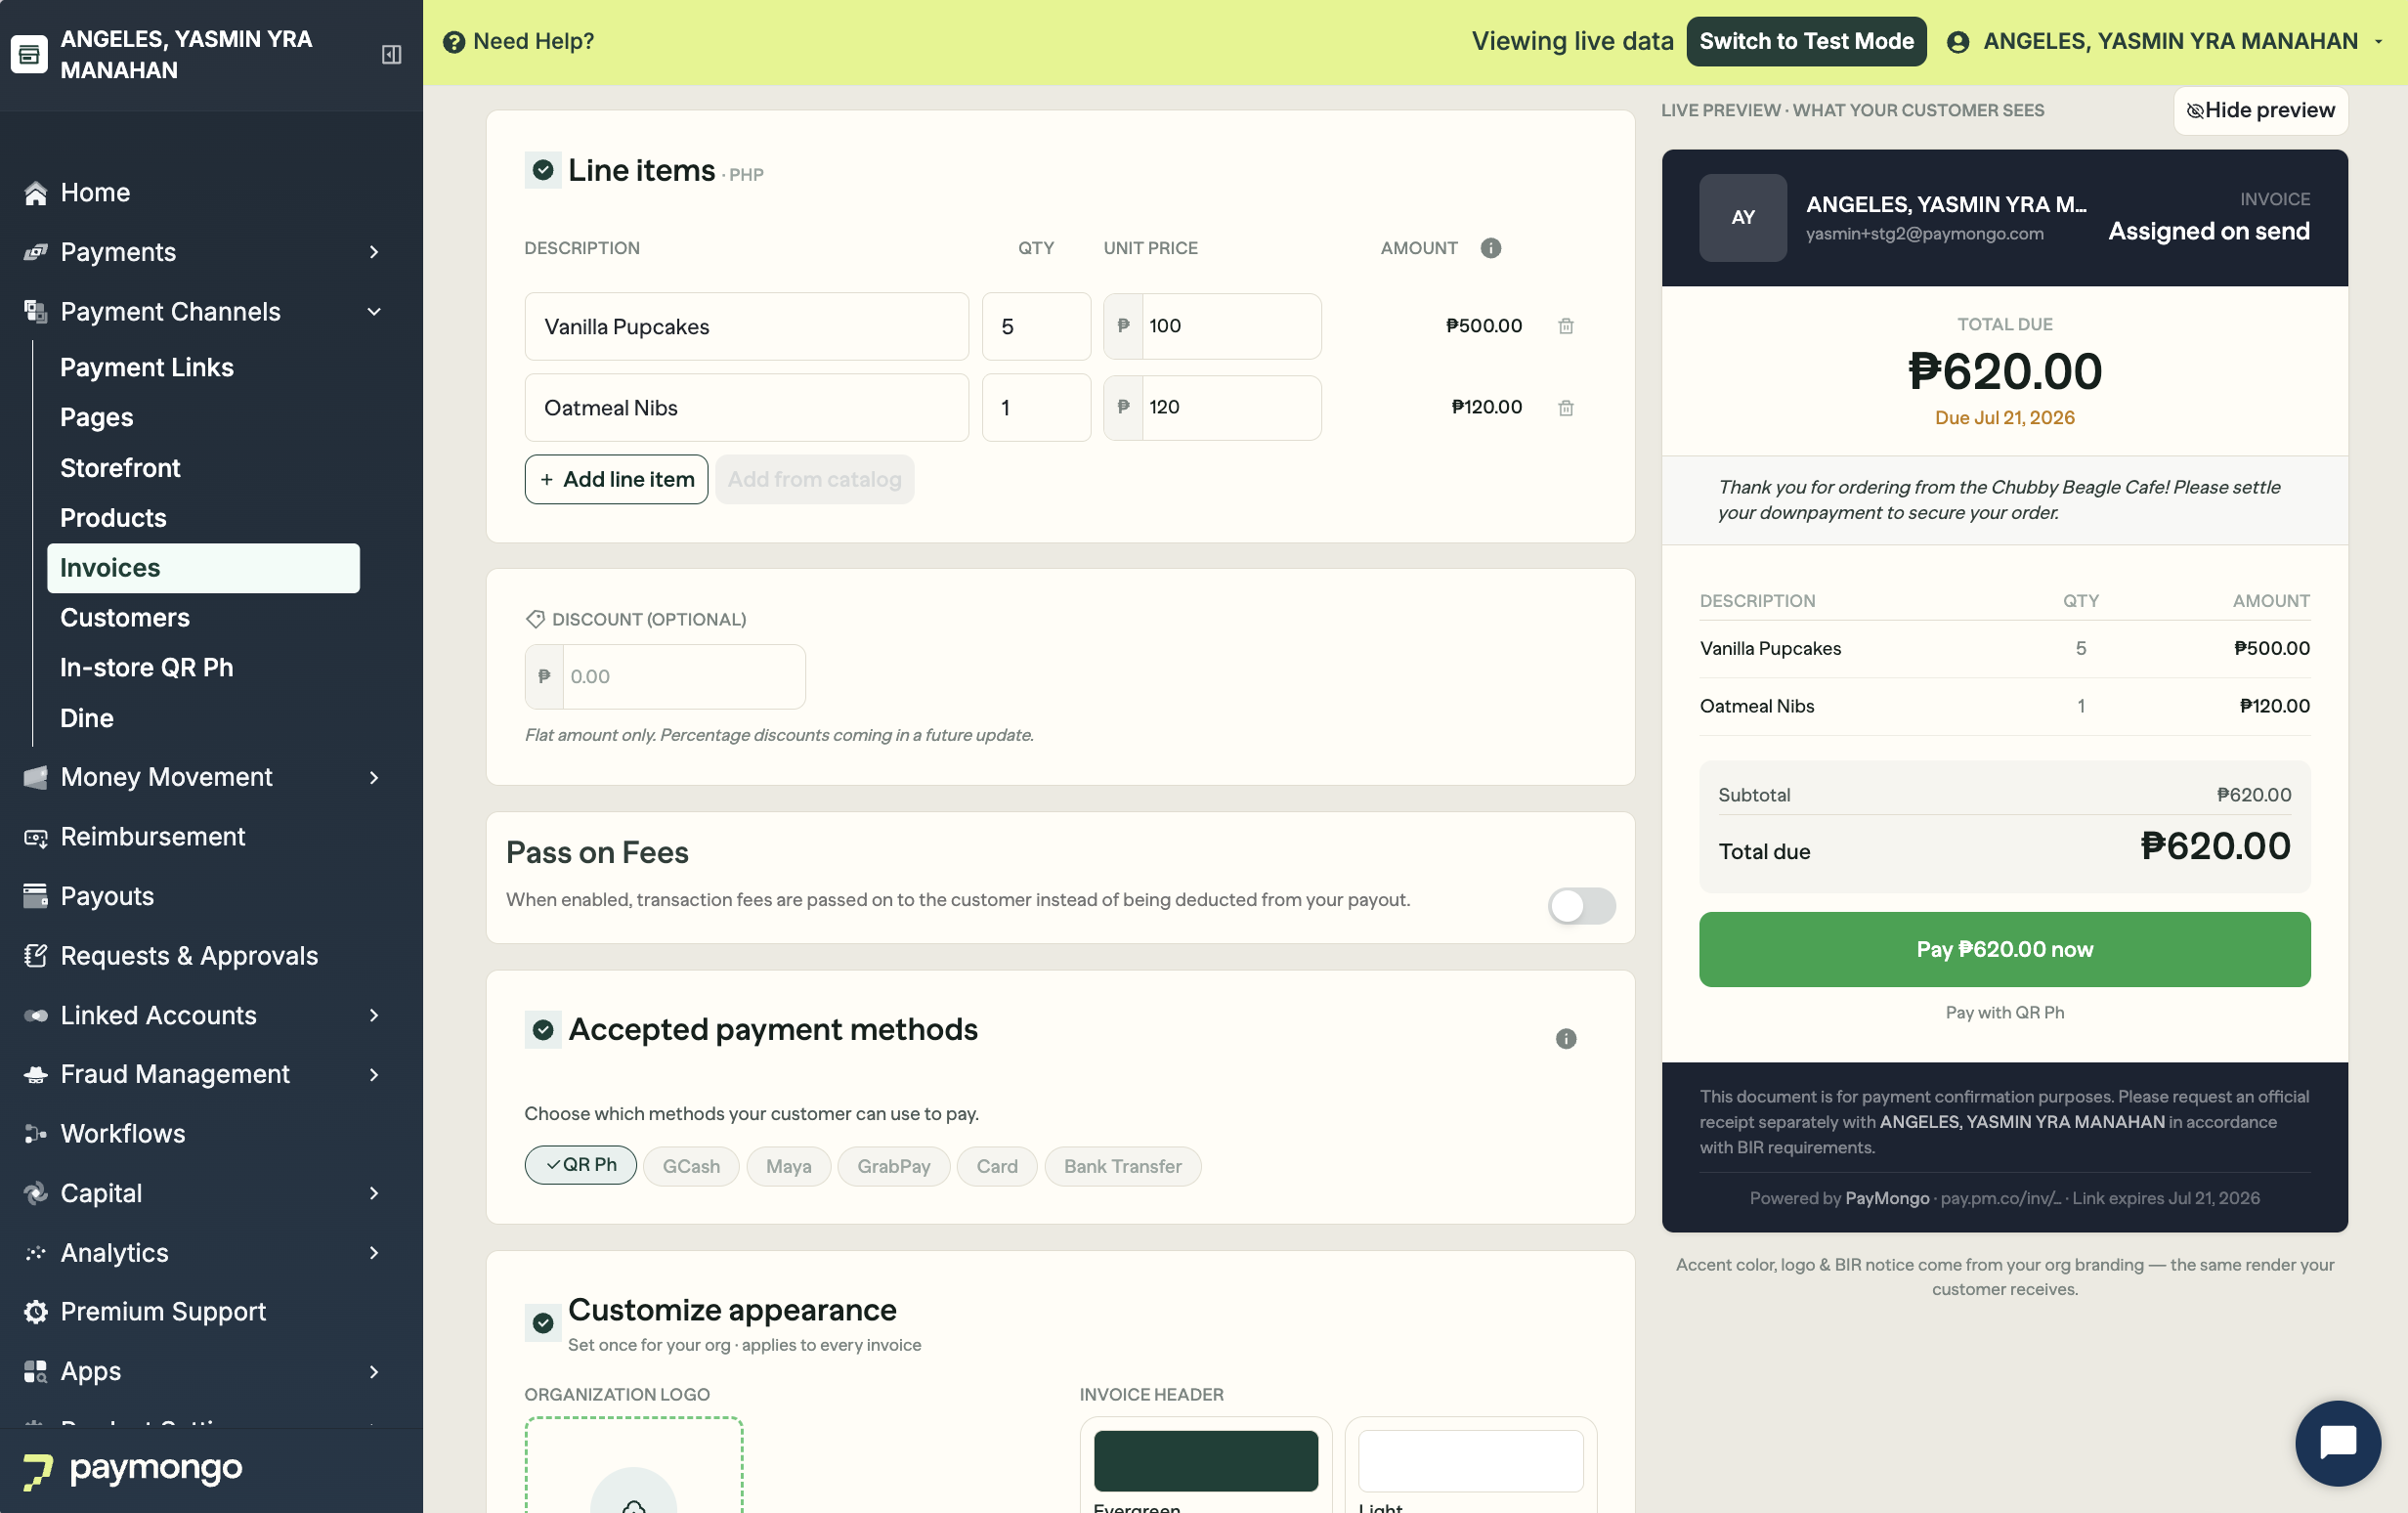
Line items, Add each product or service being billed with quantity and unit price. PayMongo calculates the totals automatically.
-
Discount, Apply a fixed-amount discount to the invoice subtotal if applicable.
-
Payment methods, Toggle which payment methods your customer can use to pay. Only methods already enabled on your account will appear.
-
Pass-on fees, Optionally pass transaction fees to your customer so you receive the full invoice amount.
-
-
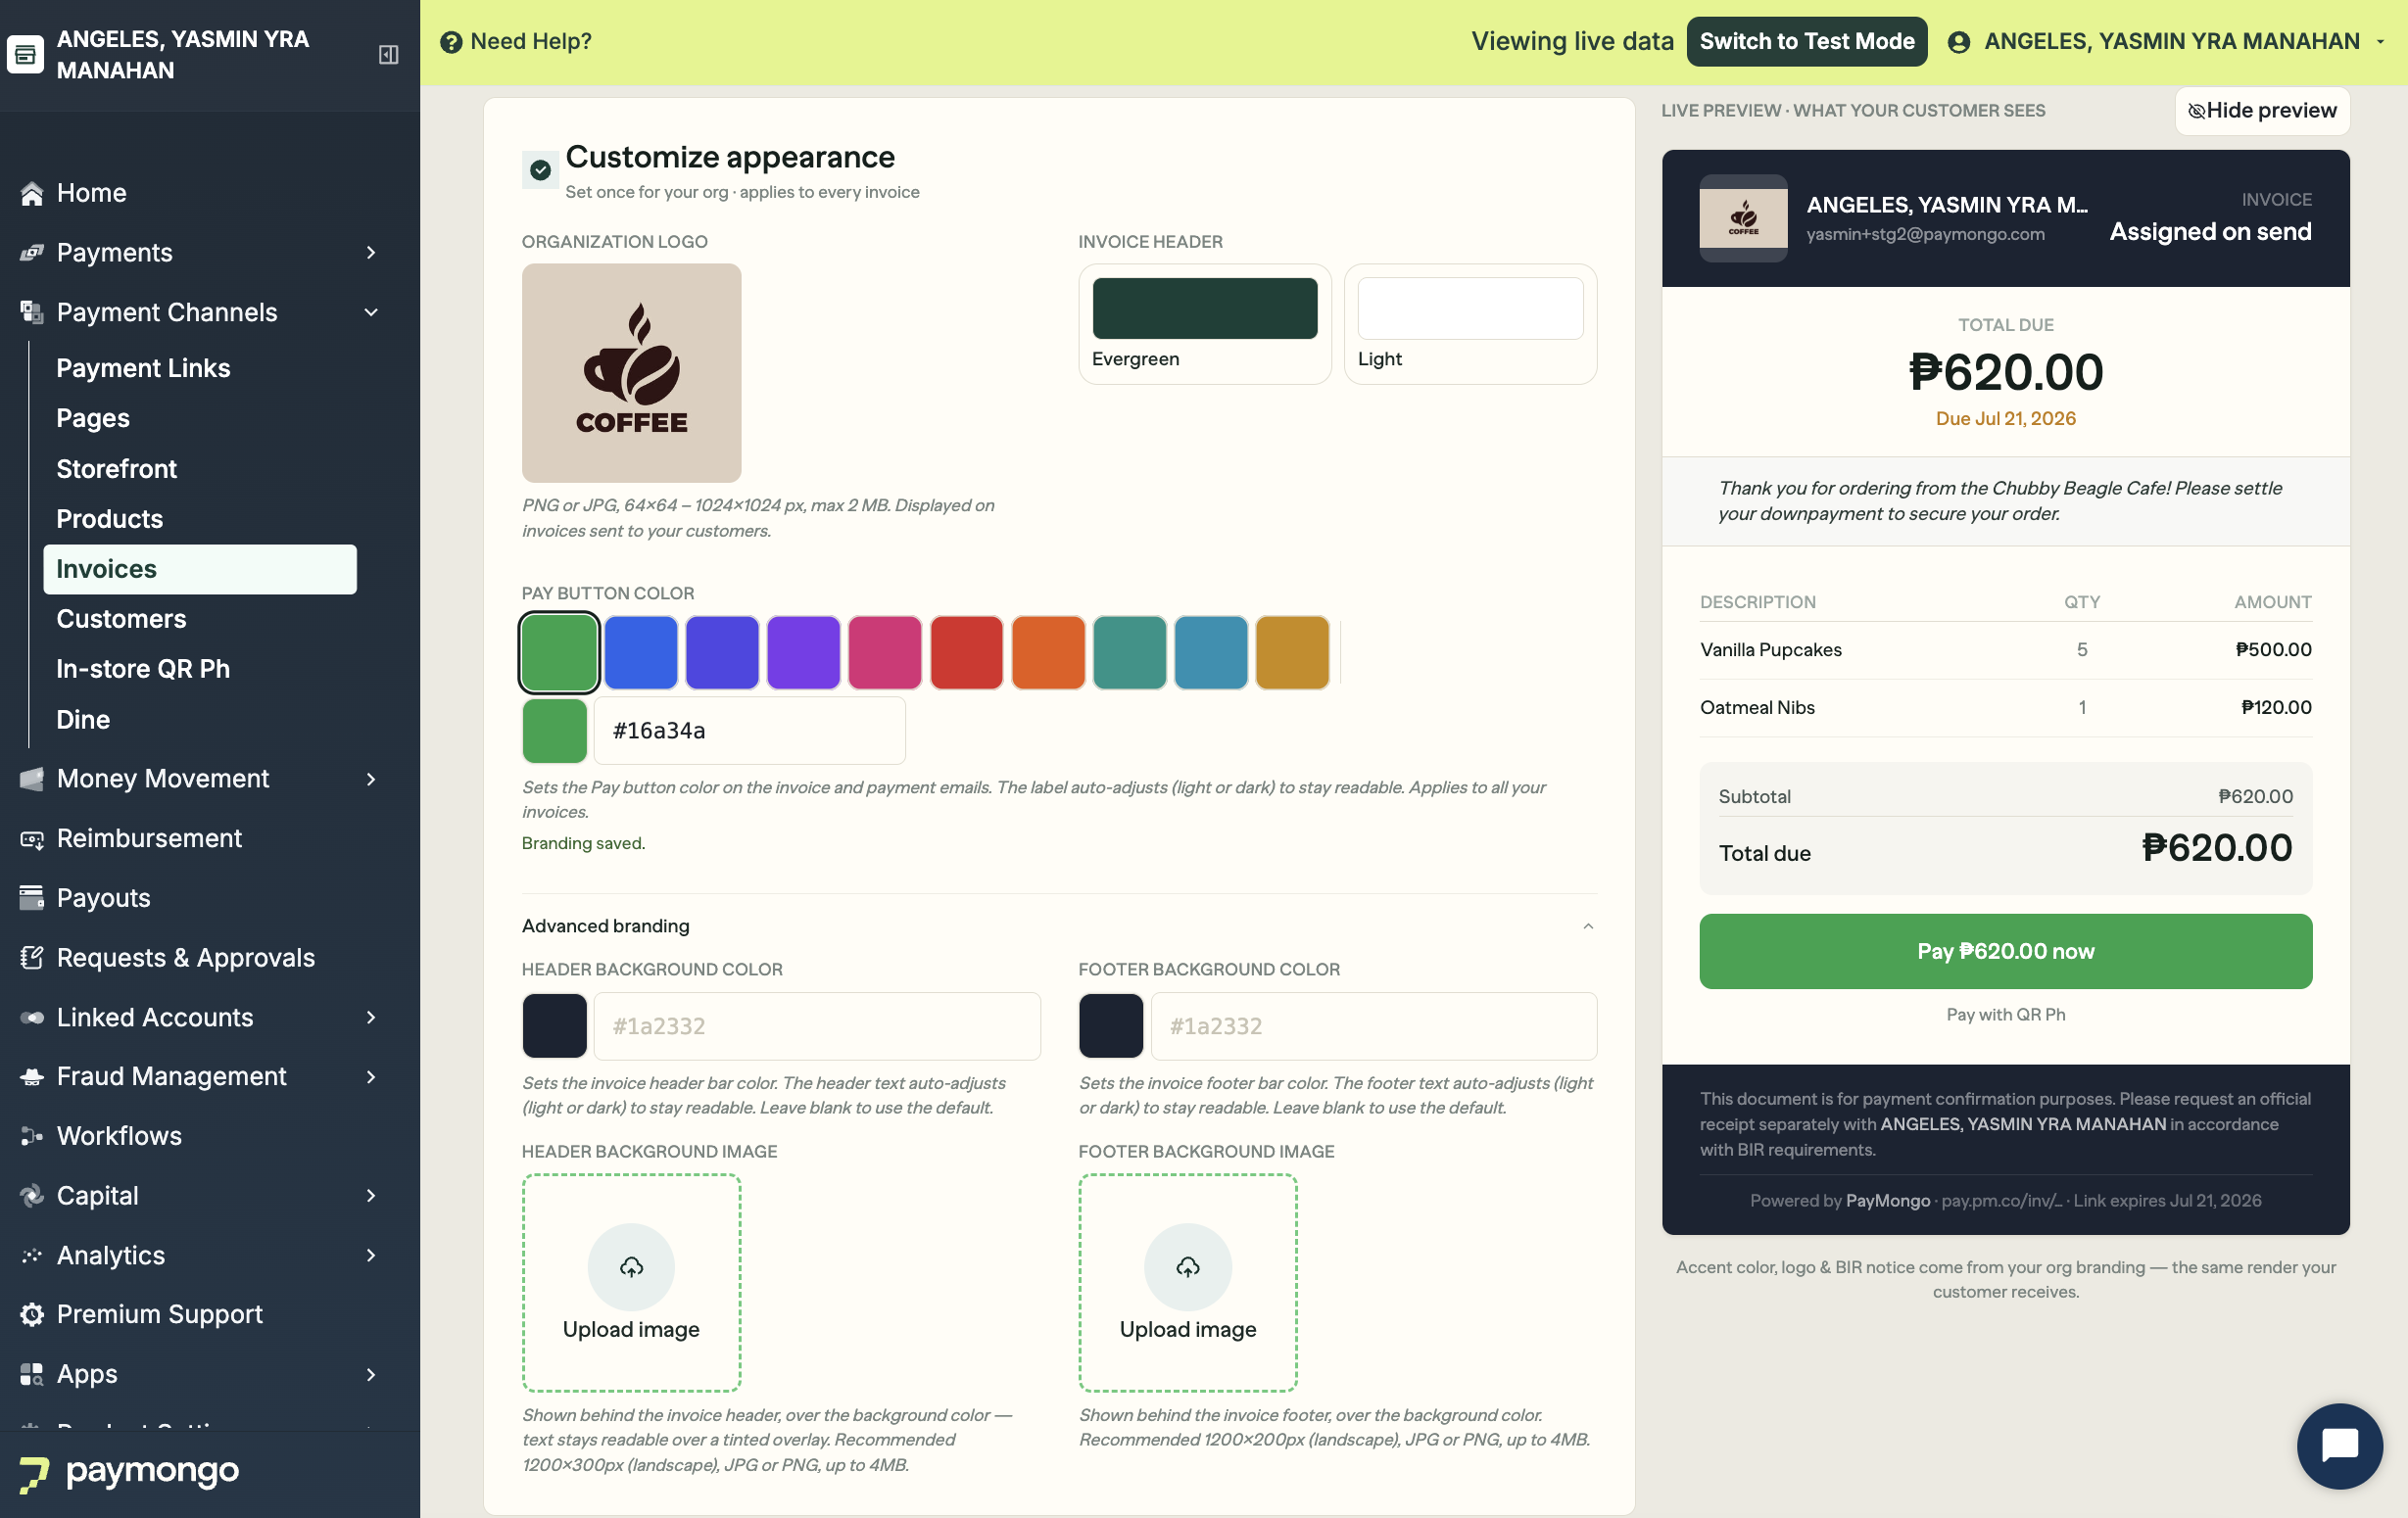
Customize appearance
You can add your logo and customize your brand colors to the Invoice so that your customers can easily associate these to your business.
-
Preview and send
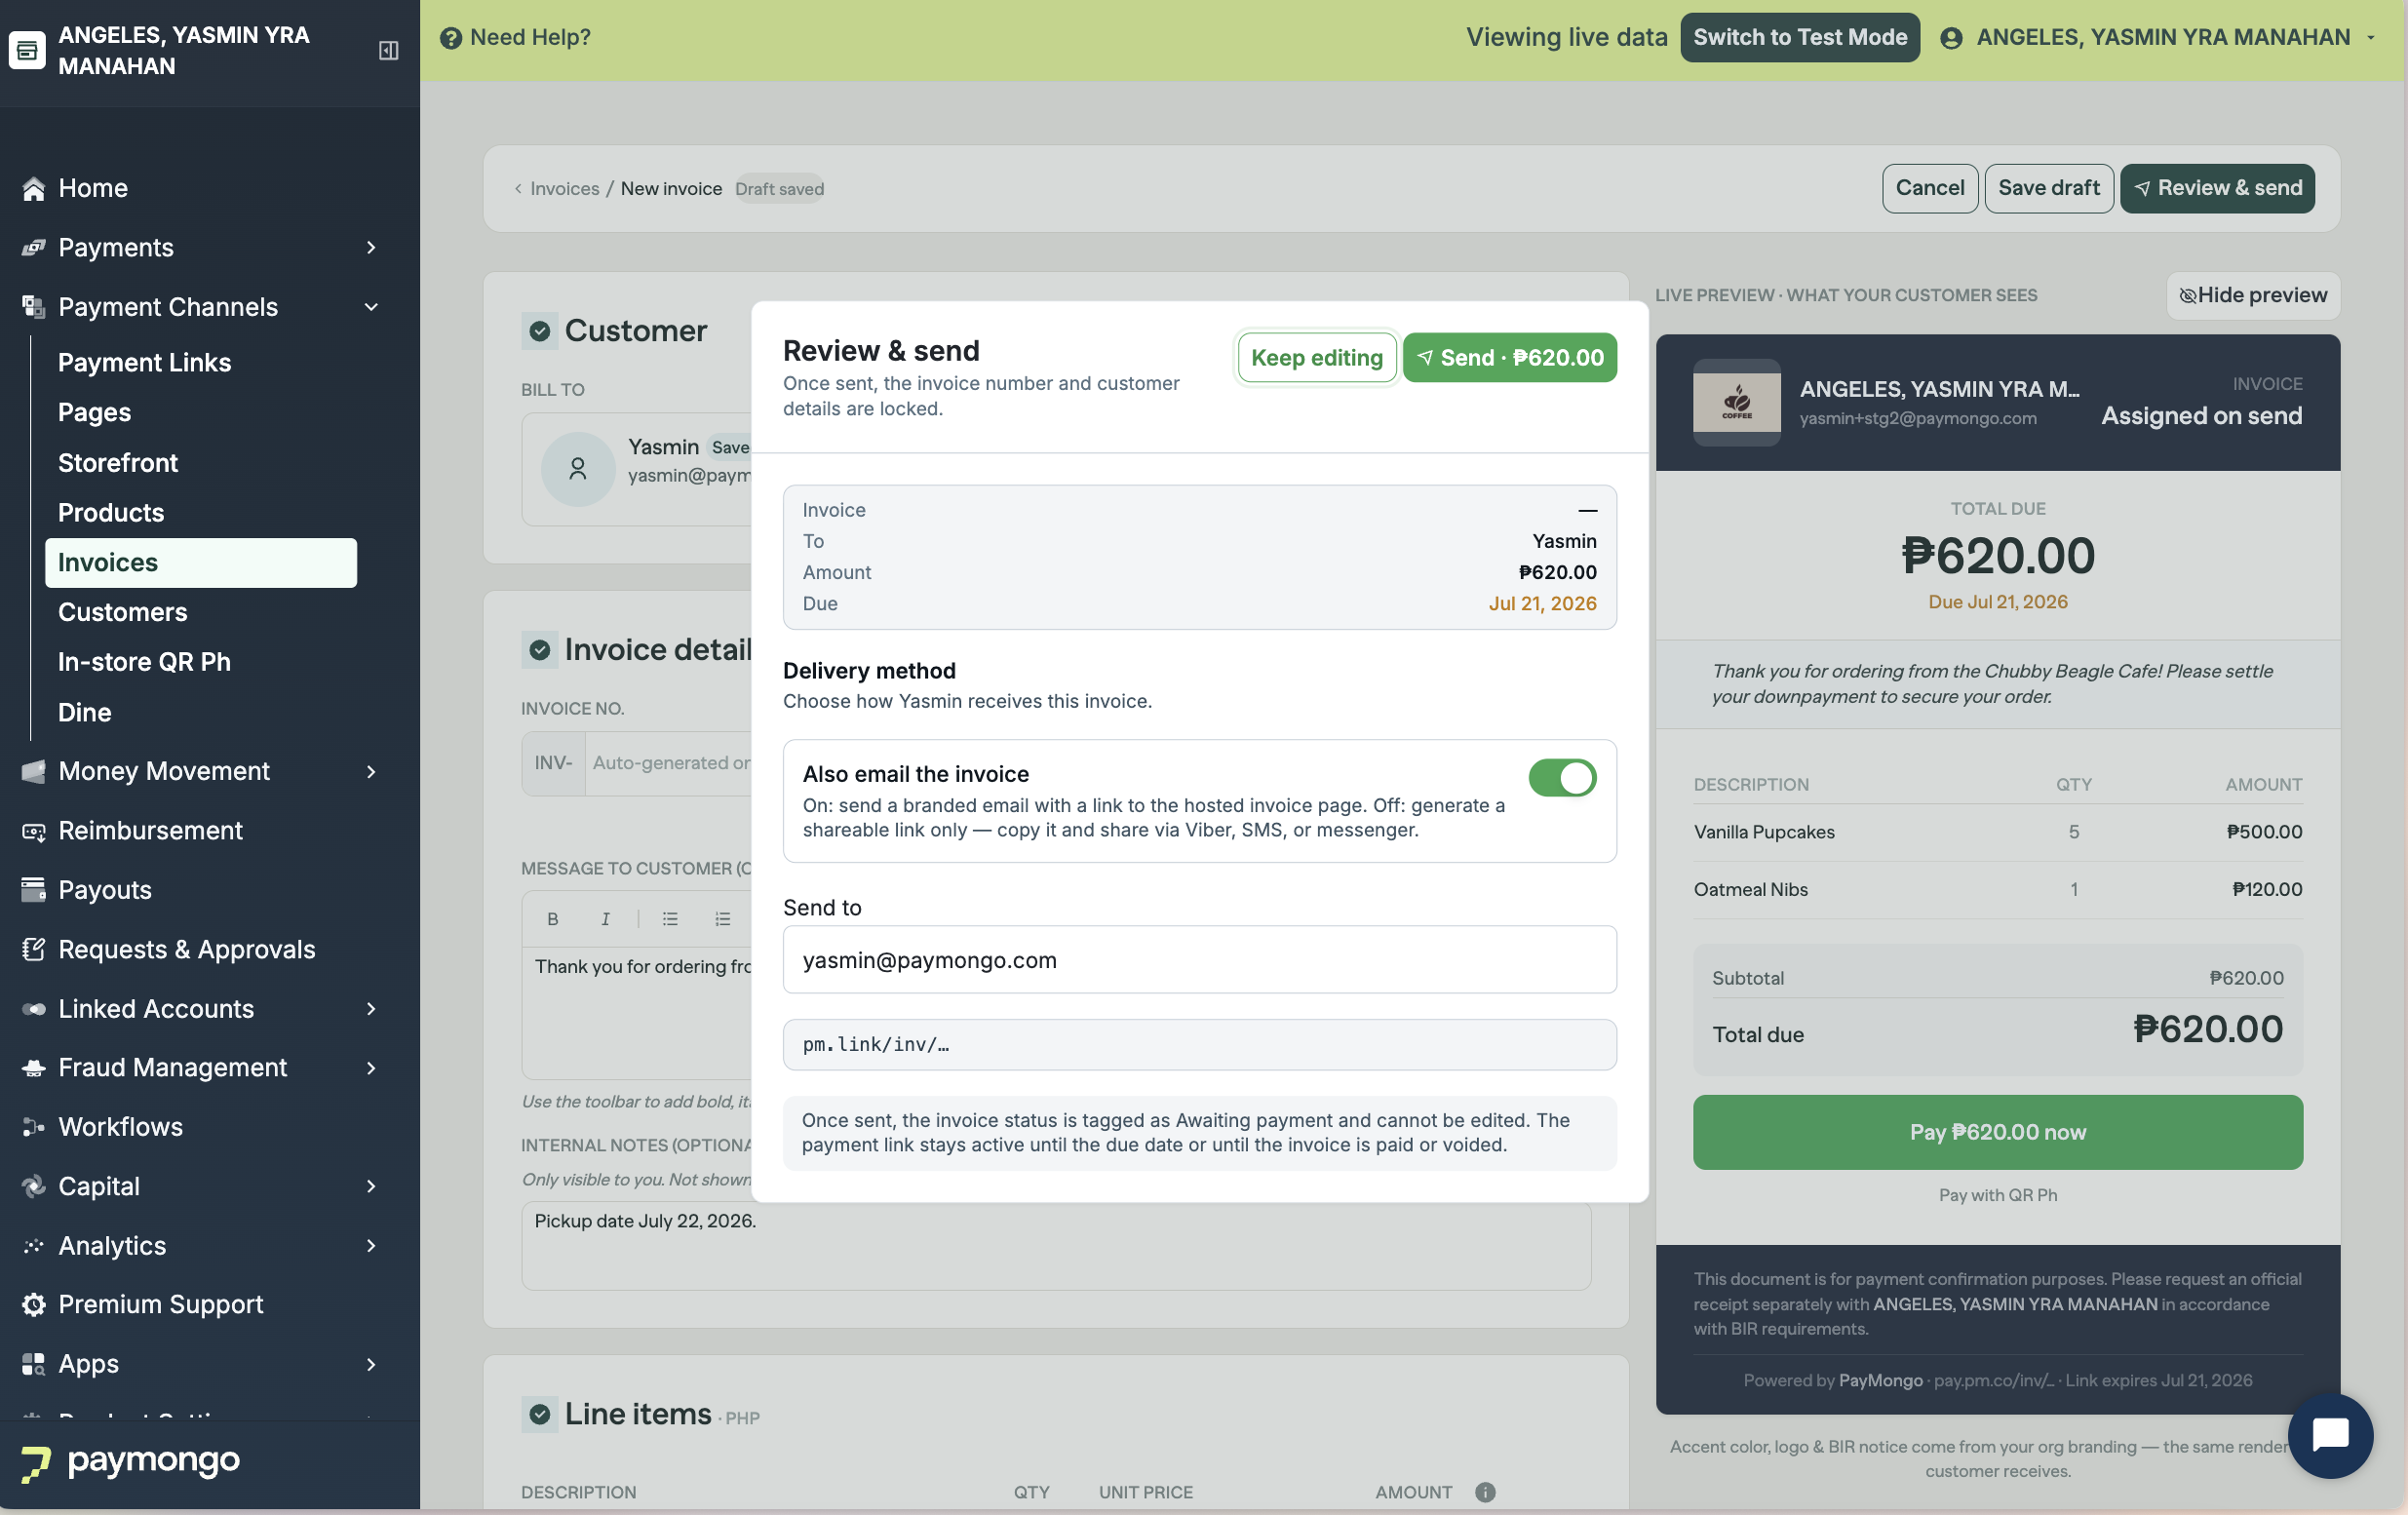
Before sending, preview the invoice to confirm how it will appear to your customer. Once ready, you can either:
-
Send via email, PayMongo sends the invoice to the customer's email address with a link to the payment page.
-
Share the link, Copy the invoice link and share it through any channel you use with your customer.
-
-
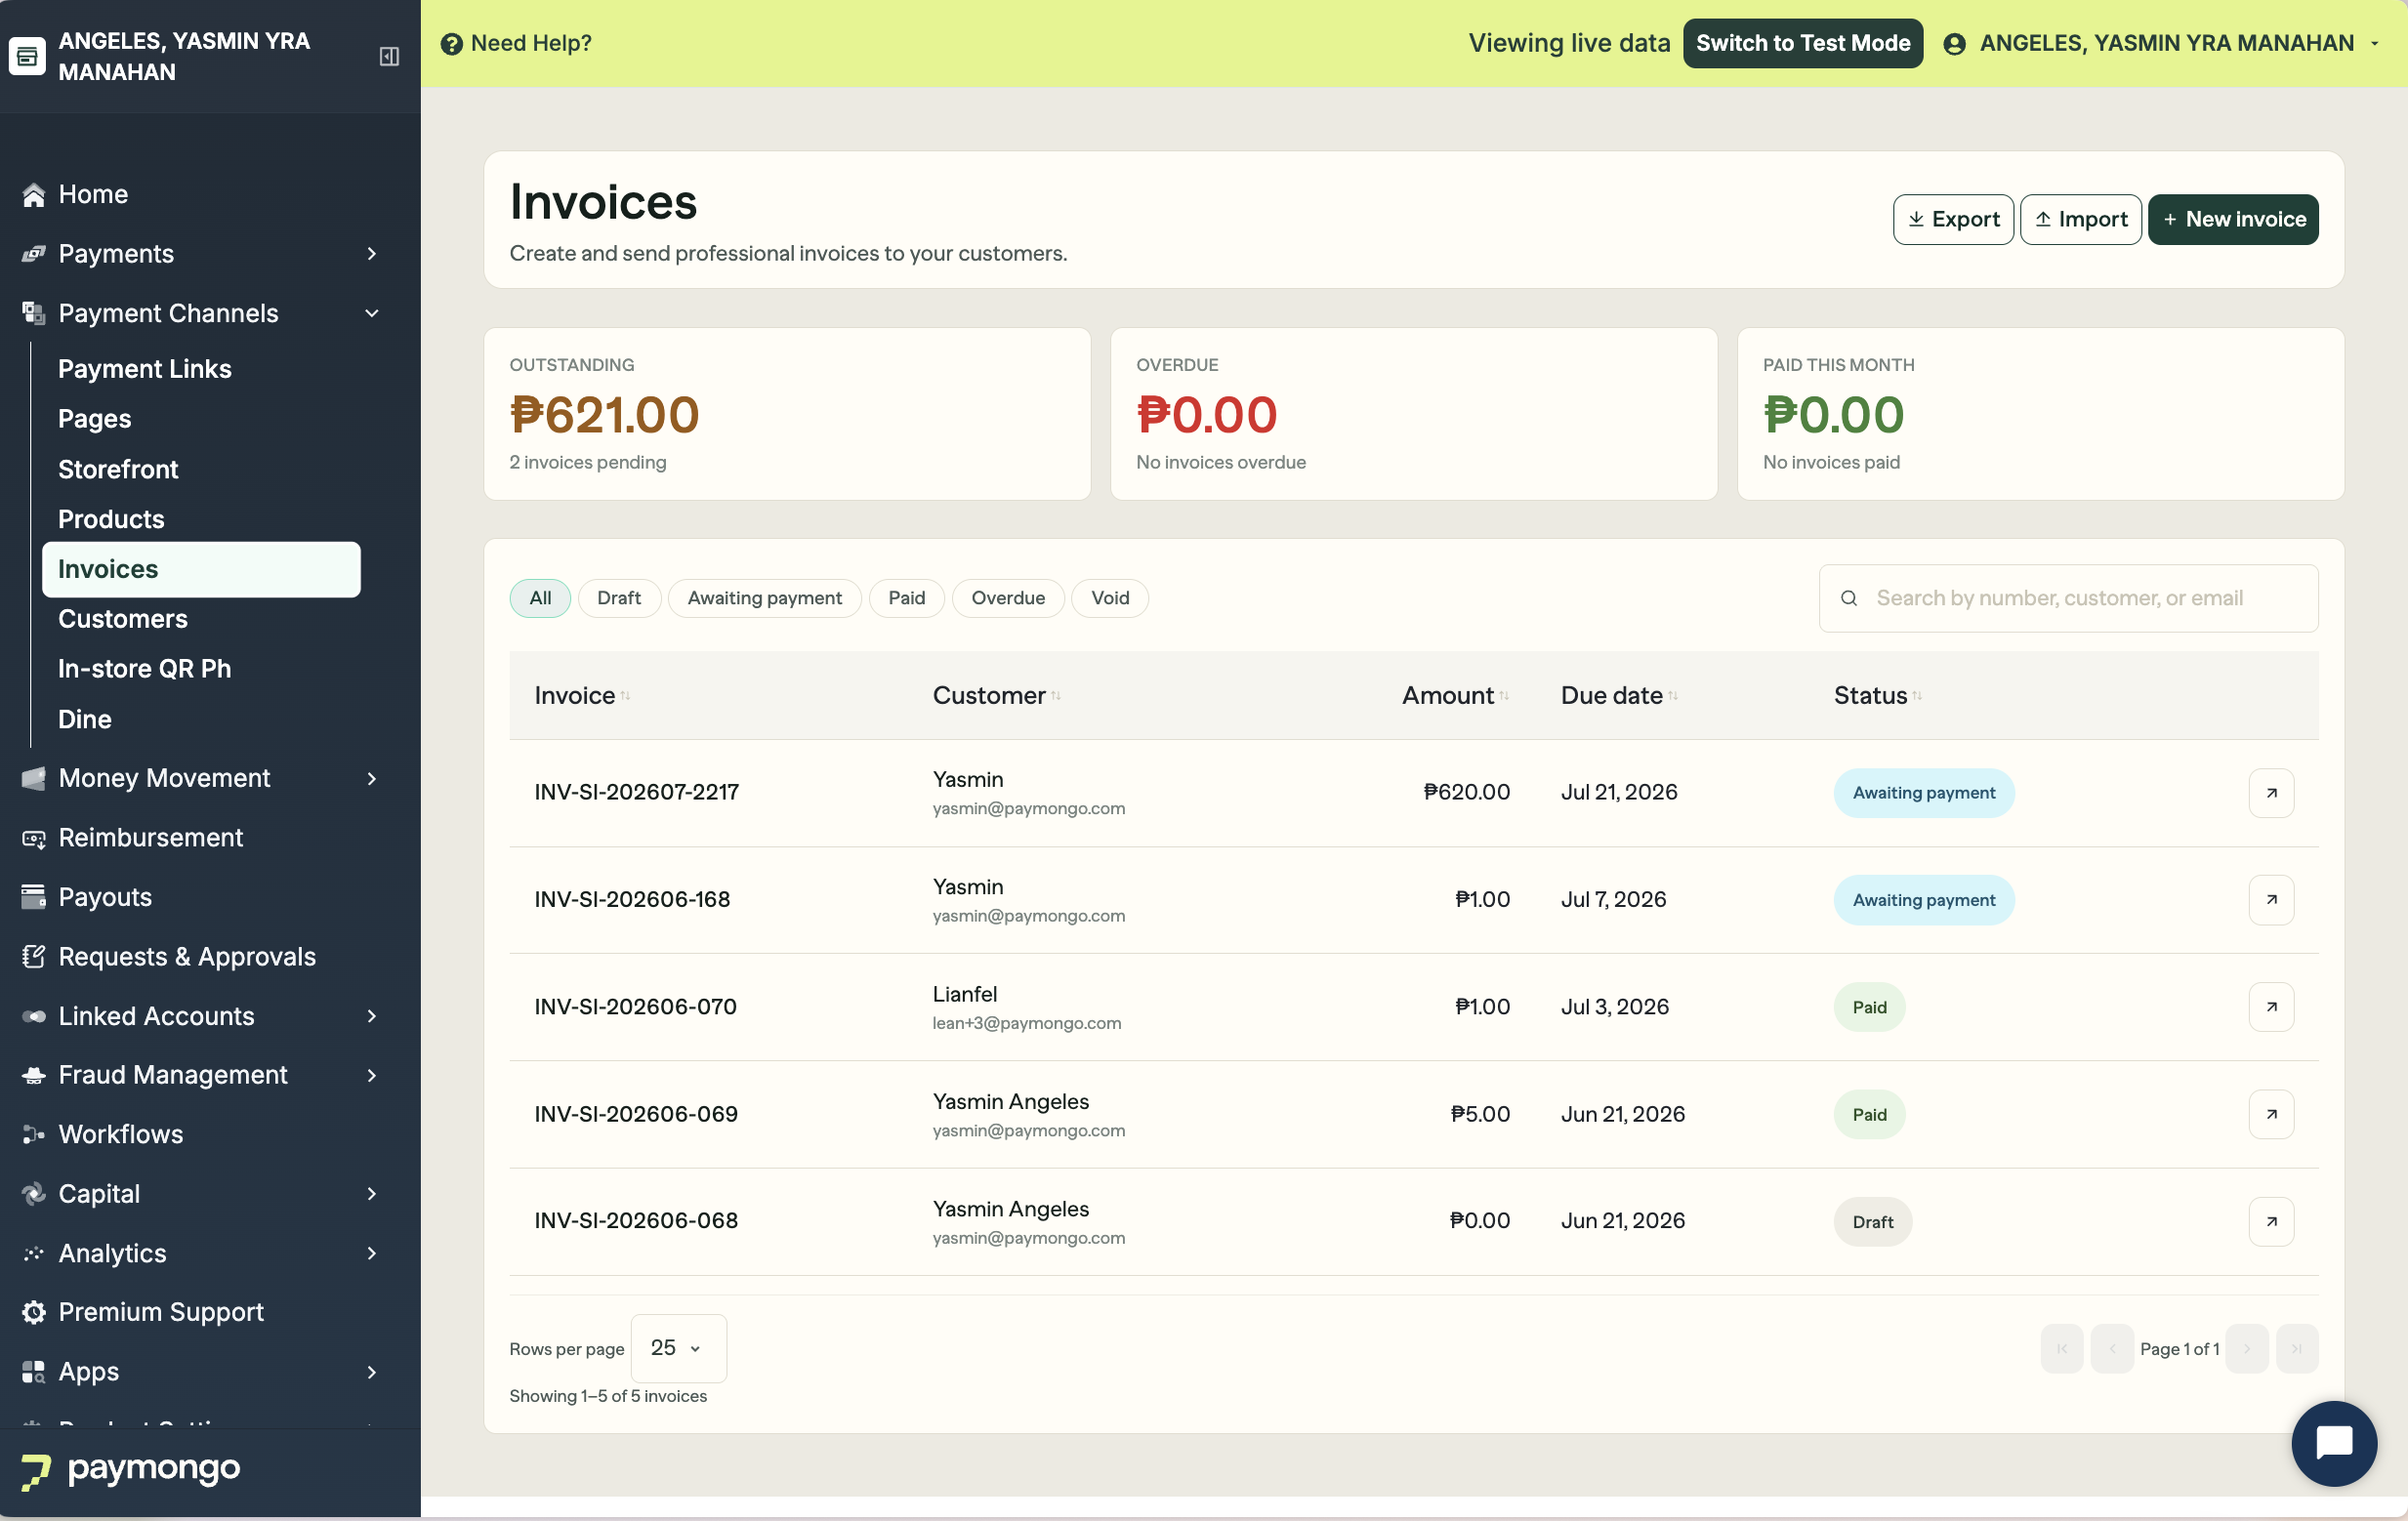
Track payment from your dashboard
Monitor all invoices from Payment Channels → Invoices. Statuses update automatically as your customer acts on the invoice or as the due date passes. When payment is completed, the transaction is recorded in your dashboard and your customer receives a payment confirmation.
Send a reminder
If an invoice is still unpaid, you can nudge your customer without creating a new one. Open the invoice from Payment Channels → Invoices and choose Remind customer, and PayMongo re-sends the invoice email with the same payment link. You can send a reminder as many times as you need while the invoice is open, and include a short message if you want.
Cancel an invoice
Sent an invoice by mistake, or no longer need it paid? Open it and click Void invoice. A voided invoice can't be paid and its payment link stops working. Voiding can't be undone, so create a new invoice if you still need to bill the customer.
Download a PDF
Every invoice can be downloaded with the Download PDF button on its detail page, and your customer can download the same PDF from their payment page. It shows the full breakdown, with line items, totals, due date, and your branding.
Import invoices in bulk
Sending a lot of invoices at once? On the Invoices page, click Bulk Invoices to create them from a CSV. Download the CSV template first so your columns line up, add one row per invoice (up to 1,000 rows), then upload. You'll go through four steps: Upload the file, Match your columns to the invoice fields, Review and fix any flagged rows, and Create. PayMongo creates all of them together, and you can send them from the list as usual.
Export your invoices
On the Invoices page, click Export to download your invoice list as a CSV for your own records or reconciliation.
Limits and availability
- Currency: PHP only
- Discounts: Fixed amounts available
- Due date: Set per invoice. Marked overdue once it passes, but stays payable and never auto-cancels.
- Maximum invoice amount: None
- Product catalog: Coming soon, line items must be entered manually for now
Before you send your invoicePlease note that the billing invoice and payment confirmation issued by PayMongo cannot be used for tax purposes. As the merchant, you are responsible for issuing official receipts to your customers in compliance with BIR requirements.
Updated 5 days ago