
Key concepts
This page covers the foundational concepts behind every payment channel. Whether you're using Hosted Checkout, a no-code option like Payment Links, or Invoicing, this is the mental model that underpins how payments flow through PayMongo.
This page is written for developers integrating Hosted Checkout, but business owners can read it to understand what's happening when a customer pays.
Checkout Session
A Checkout Session is the object that powers every payment channel. When a customer pays through Hosted Checkout, a Payment Link, a Payment Page, an e-commerce plugin, or a Storefront checkout, a Checkout Session is what they actually interact with.
A Checkout Session represents one customer's attempt to pay for one order. It holds the amount, the available payment methods, the customer's selection, payment attempts, and the resulting payment.
Checkout Session URL
When you create a Checkout Session, PayMongo returns a hosted URL of the form:
https://checkout.paymongo.com/<checkout_session_id>Open the URL to send the customer to PayMongo's hosted checkout page. The page renders the payment methods you enabled, collects the customer's payment details, and handles redirects to bank or wallet apps where required.
Checkout Session lifecycle
sequenceDiagram
    participant M as Merchant backend
    participant P as PayMongo
    participant C as Customer
    participant B as Bank / Wallet

    M->>P: Create Checkout Session
    P-->>M: Returns checkout URL
    M->>C: Redirect to checkout URL
    C->>P: Selects payment method
    P->>P: Creates Payment Intent
    P->>C: Redirect to authorization
    C->>B: Authorizes payment
    alt Payment succeeds
        B-->>P: Success
        P->>C: Show success page
        P-->>M: checkout_session.payment.paid webhook
        M-->>P: Acknowledge webhook
    else Payment fails
        B-->>P: Failure
        P->>C: Show error, allow retry
        Note over P: New Payment Intent created on retry
    end
Each Checkout Session can produce multiple Payment Intents — one per attempt. If a customer's first attempt fails, they can retry with a different method, and PayMongo creates a fresh Payment Intent for that attempt. The Checkout Session stays the same throughout.
To learn more about Payment Intents, see Payment Acceptance → Key concepts.
Payment attempts and retries
A Checkout Session holds only one active Payment Intent at a time. When a customer retries after a failed or abandoned attempt, PayMongo closes the previous attempt before it creates a new one. For QR Ph, the previous QR code expires before a new one is generated.
Opening the same checkout URL in two browser tabs does not create two payable attempts. Both tabs work on the same Payment Intent. If the customer generates a new QR code from either tab, PayMongo expires the previous code first, so only one code can be paid at any time.
Once a payment succeeds, the session is complete. PayMongo rejects any further attempt on that session, so one Checkout Session can never produce more than one successful payment. The payments array on the session object and in the checkout_session.payment.paid webhook can list several entries, but at most one of them has status: "paid".
This makes it safe to let a customer return to the original checkout URL while the session is active. You do not need to create a new session for a customer who left the payment page and came back.
Checkout Session status
A Checkout Session is in one of two states:
-
active— The session is open and the customer can still complete payment. -
expired— The session has been explicitly closed and no longer accepts payment.
Checkout Sessions do not expire on their own. There is no default time limit — an active session stays open indefinitely until you mark it as expired. A session moves to expired only when:
-
You call the Expire a Checkout Session API endpoint, or
-
You archive the underlying Payment Link or Payment Page from the dashboard. Once expired, the checkout URL no longer accepts payment. If the customer still wants to pay, create a new session.
Expiring a Checkout Session
Expiring a session cancels its Payment Intent and expires any QR code tied to that intent. The Payment Intent moves to cancelled, which is a terminal state. No payment can be recorded on an expired session.
The Expire endpoint returns a 400 error instead of expiring the session when:
- The session is already
expired. - The session already has a
paidpayment. - The session has a payment that is still
pendingorprocessing.
A session whose Payment Intent is only waiting for a QR scan or a redirect has no ongoing payment yet, so you can expire it.
If your application expires abandoned sessions automatically, handle this error. Retrieve the session. If it has a paid payment, fulfill the order. If a payment is still processing, wait for the checkout_session.payment.paid webhook and try to expire the session again later. Do not create a replacement session for the same order until the original session is confirmed expired.
PayMongo does not send a webhook when a session expires. Record the expiry in your system from the API response.
An expired QR code is not the same as an expired session. A QR Ph code has its own validity period, 30 minutes by default. When the code expires, the session stays
activeand the customer can generate a new code from the same checkout page. See QR Ph API for the expiry settings.
Payments made after expiry
A customer may save or screenshot a QR code before the session expires. Most banking and e-wallet apps reject an expired QR Ph code. If an app still sends the funds, PayMongo rejects the payment because the Payment Intent is cancelled. No payment is recorded on the session, no checkout_session.payment.paid event is sent, and the payment does not appear in your Payments tab. Contact PayMongo support with the customer's transaction reference so the funds can be traced and returned. See Troubleshooting.
Hosted Checkout
Hosted Checkout uses the Checkout API: you send PayMongo the payment details, and PayMongo hosts the checkout UI. Self-hosted checkout uses the Payment API: you build the checkout UI yourself and call the Payments APIs directly.
Both flows result in a paid Payment Intent. The difference is which API you use and who owns the customer-facing experience.
| Hosted Checkout | Self-hosted Checkout | |
|---|---|---|
| API used | Checkout API | Payment API |
| Who builds the payment experience | PayMongo | Merchant |
| New payment methods support | Available automatically | Need manual integration |
| PCI DSS scope | Minimal | Higher |
| Branding control | Limited | Full control |
Pick Hosted Checkout when you have a system that needs to accept payment but you don't want to build and maintain a payment UI. You provide the payment request and PayMongo handles the rest.
Pick Self-hosted Checkout when the checkout experience needs to live inside your own UI and you're prepared to maintain it as payment methods evolve. See Payment Acceptance for the Payment API flow.
Webhooks
PayMongo notifies your backend of payment outcomes through webhooks. The key event for Checkout Sessions is:
checkout_session.payment.paid— Sent when a customer successfully completes payment. The payload includes the full Checkout Session object and the resulting payment details, so you can fulfill the order without an additional API call.link.payment.paid— Sent when a customer successfully completes payment from Payment Links.
Set up webhooks in your dashboard under Settings → Webhooks.
Pass-on Fees
By default, PayMongo's transaction fee is deducted from the amount you receive. If you'd rather pass the fee to the customer, set pass_on_fees: true when creating a Checkout Session. PayMongo automatically calculates and adds the correct fee for whichever payment method the customer selects.
For more details about how pass-on fees are calculated, see Payment Acceptance → Pass-on Fees.
Enable pass-on fees from the dashboard
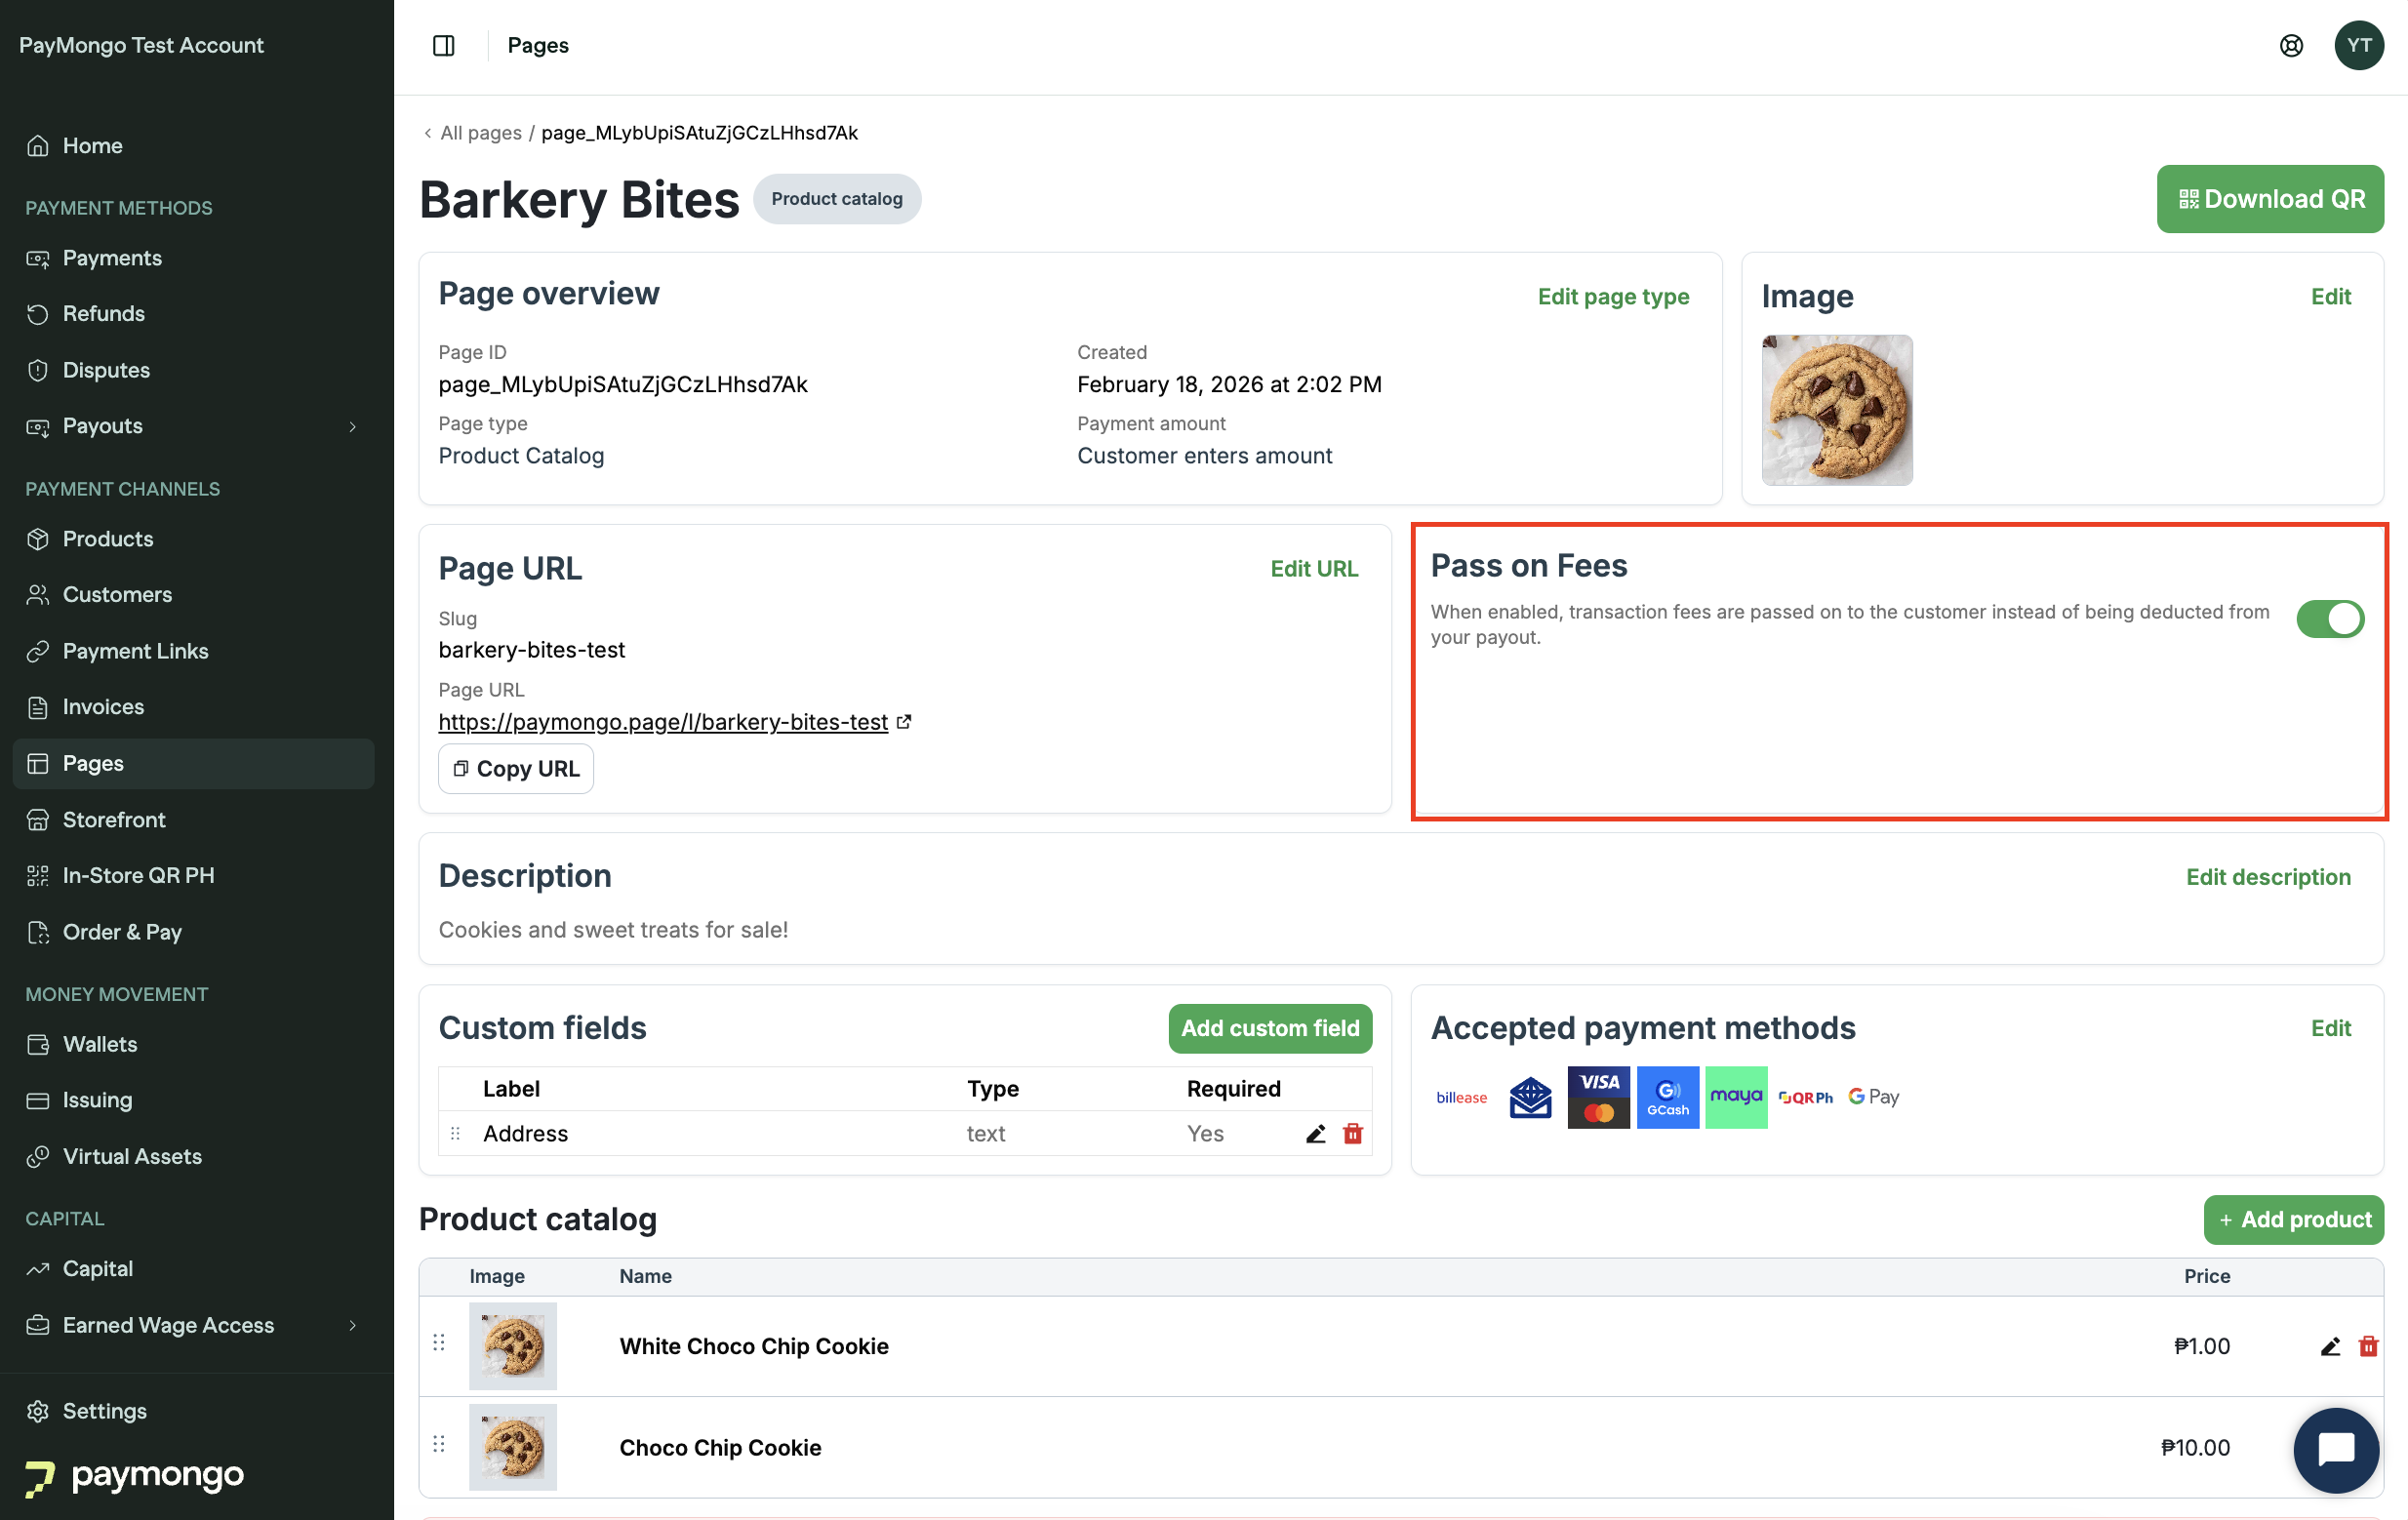
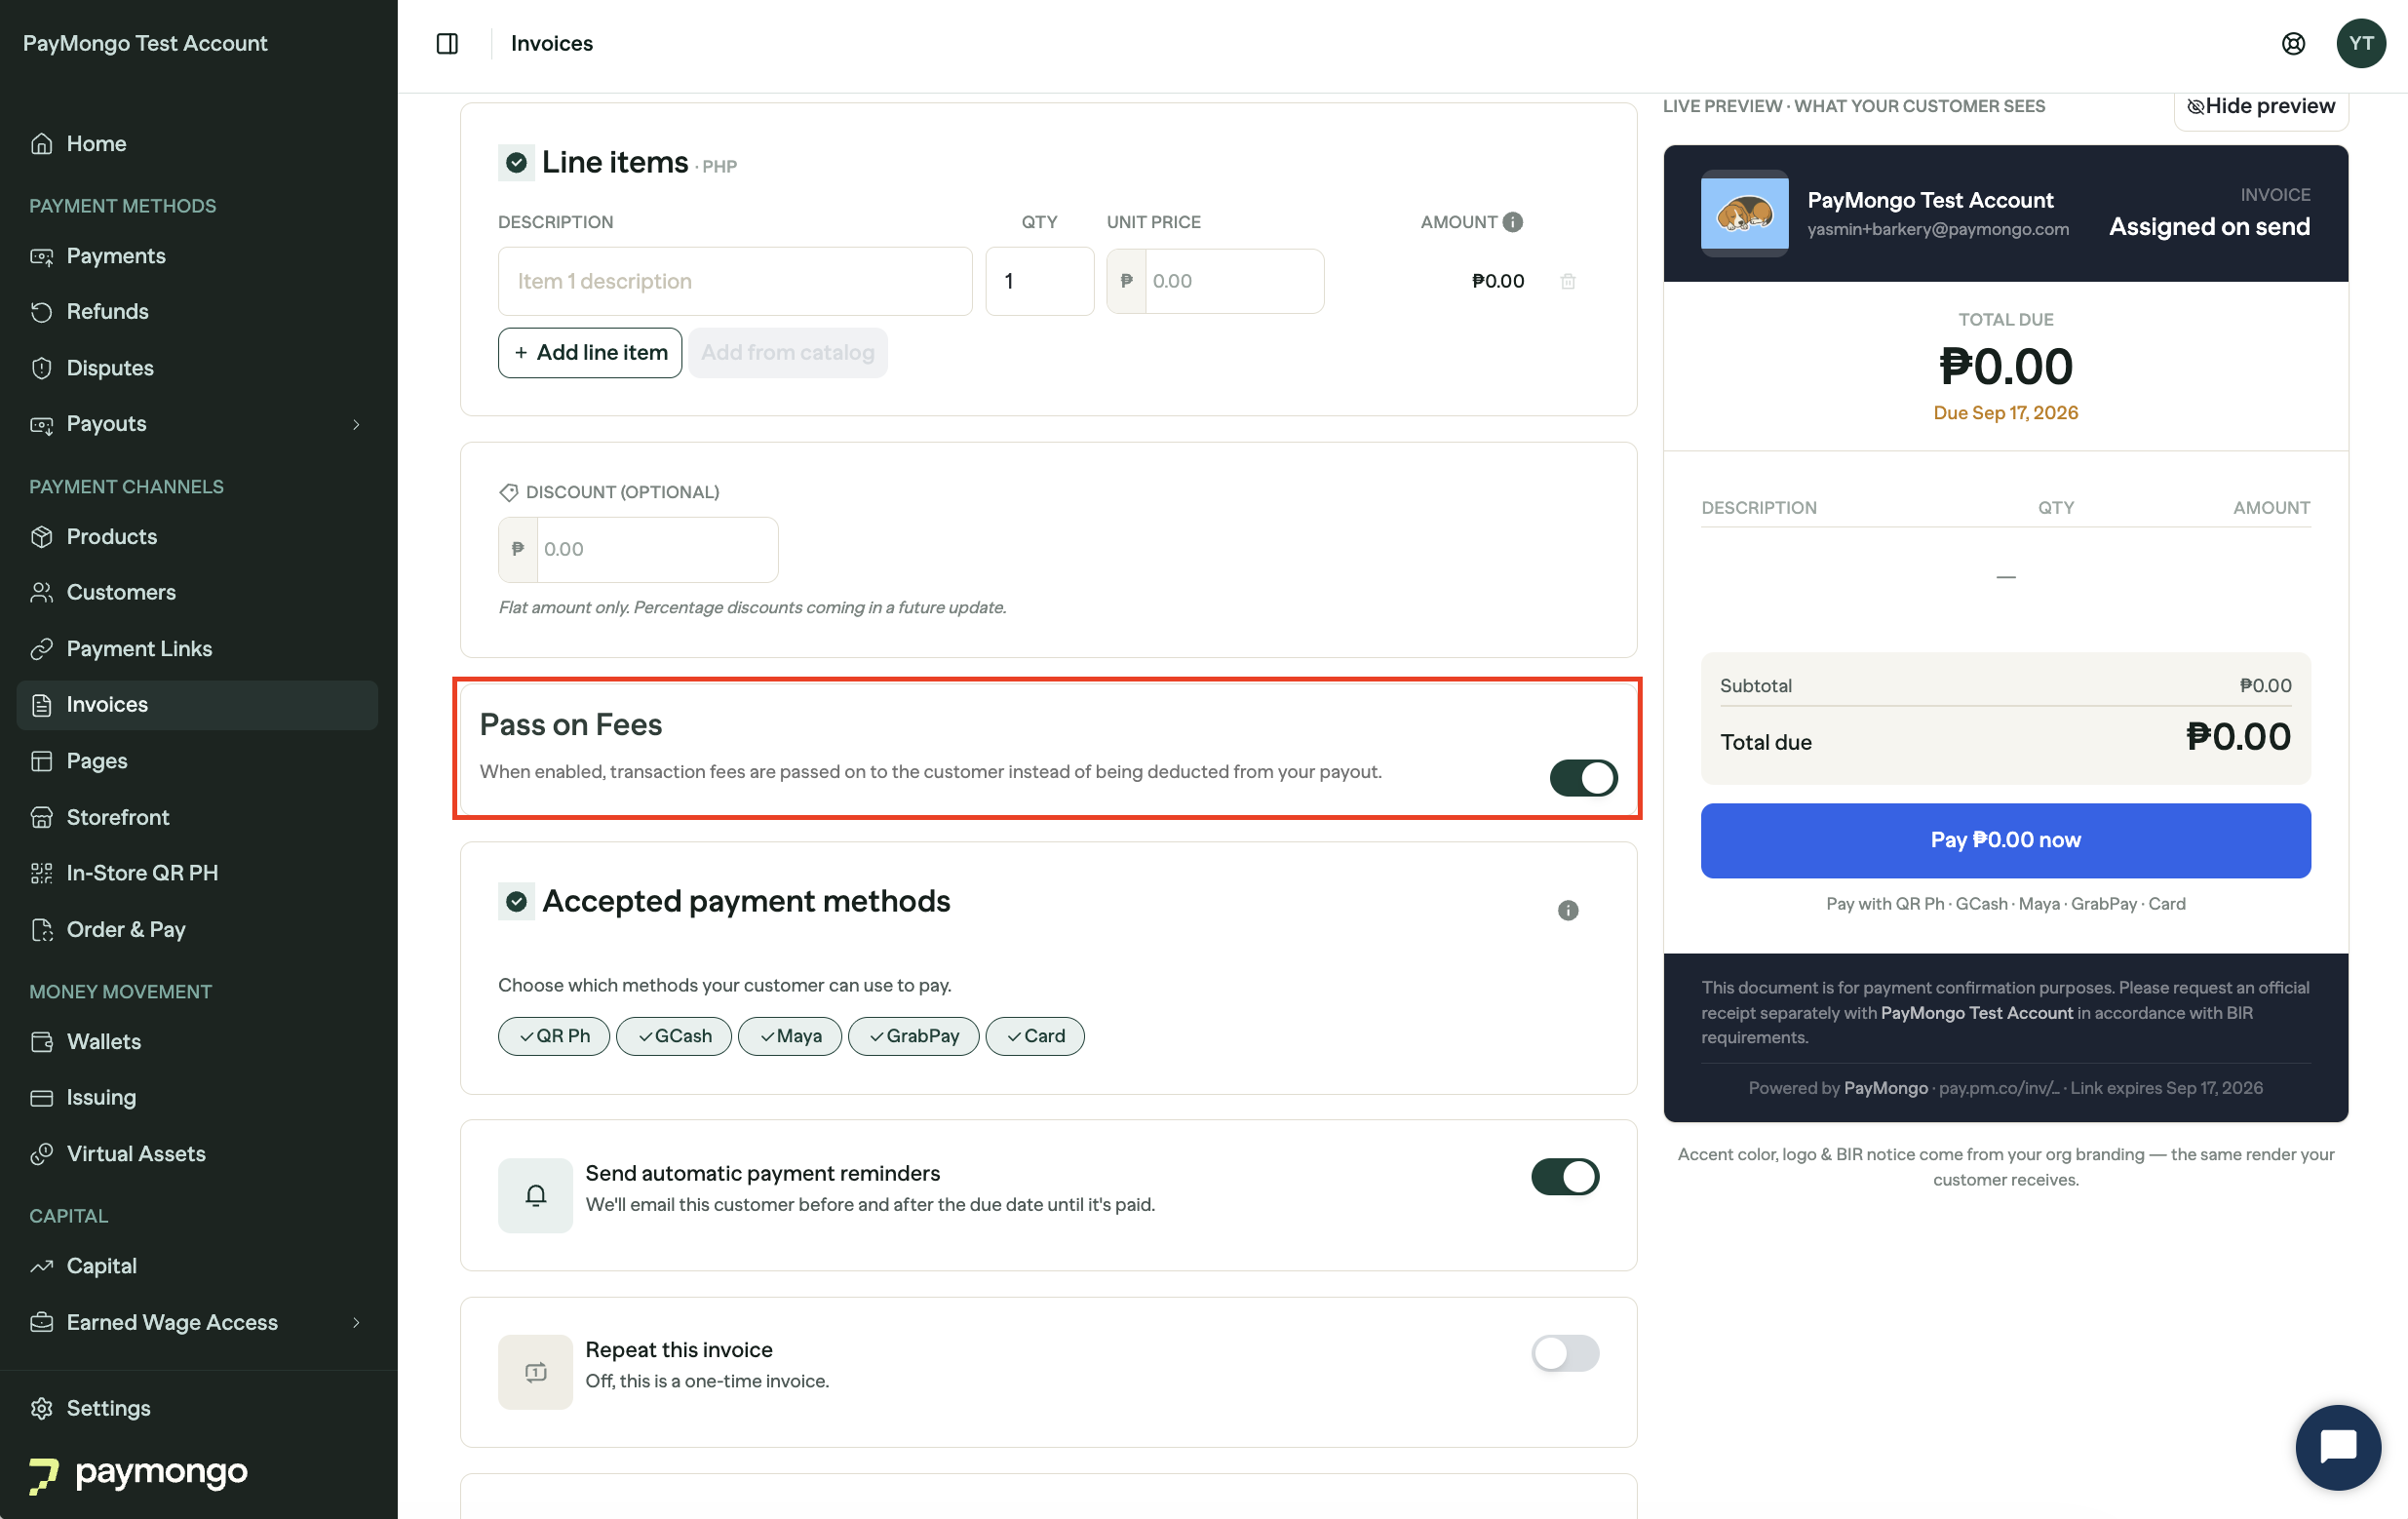
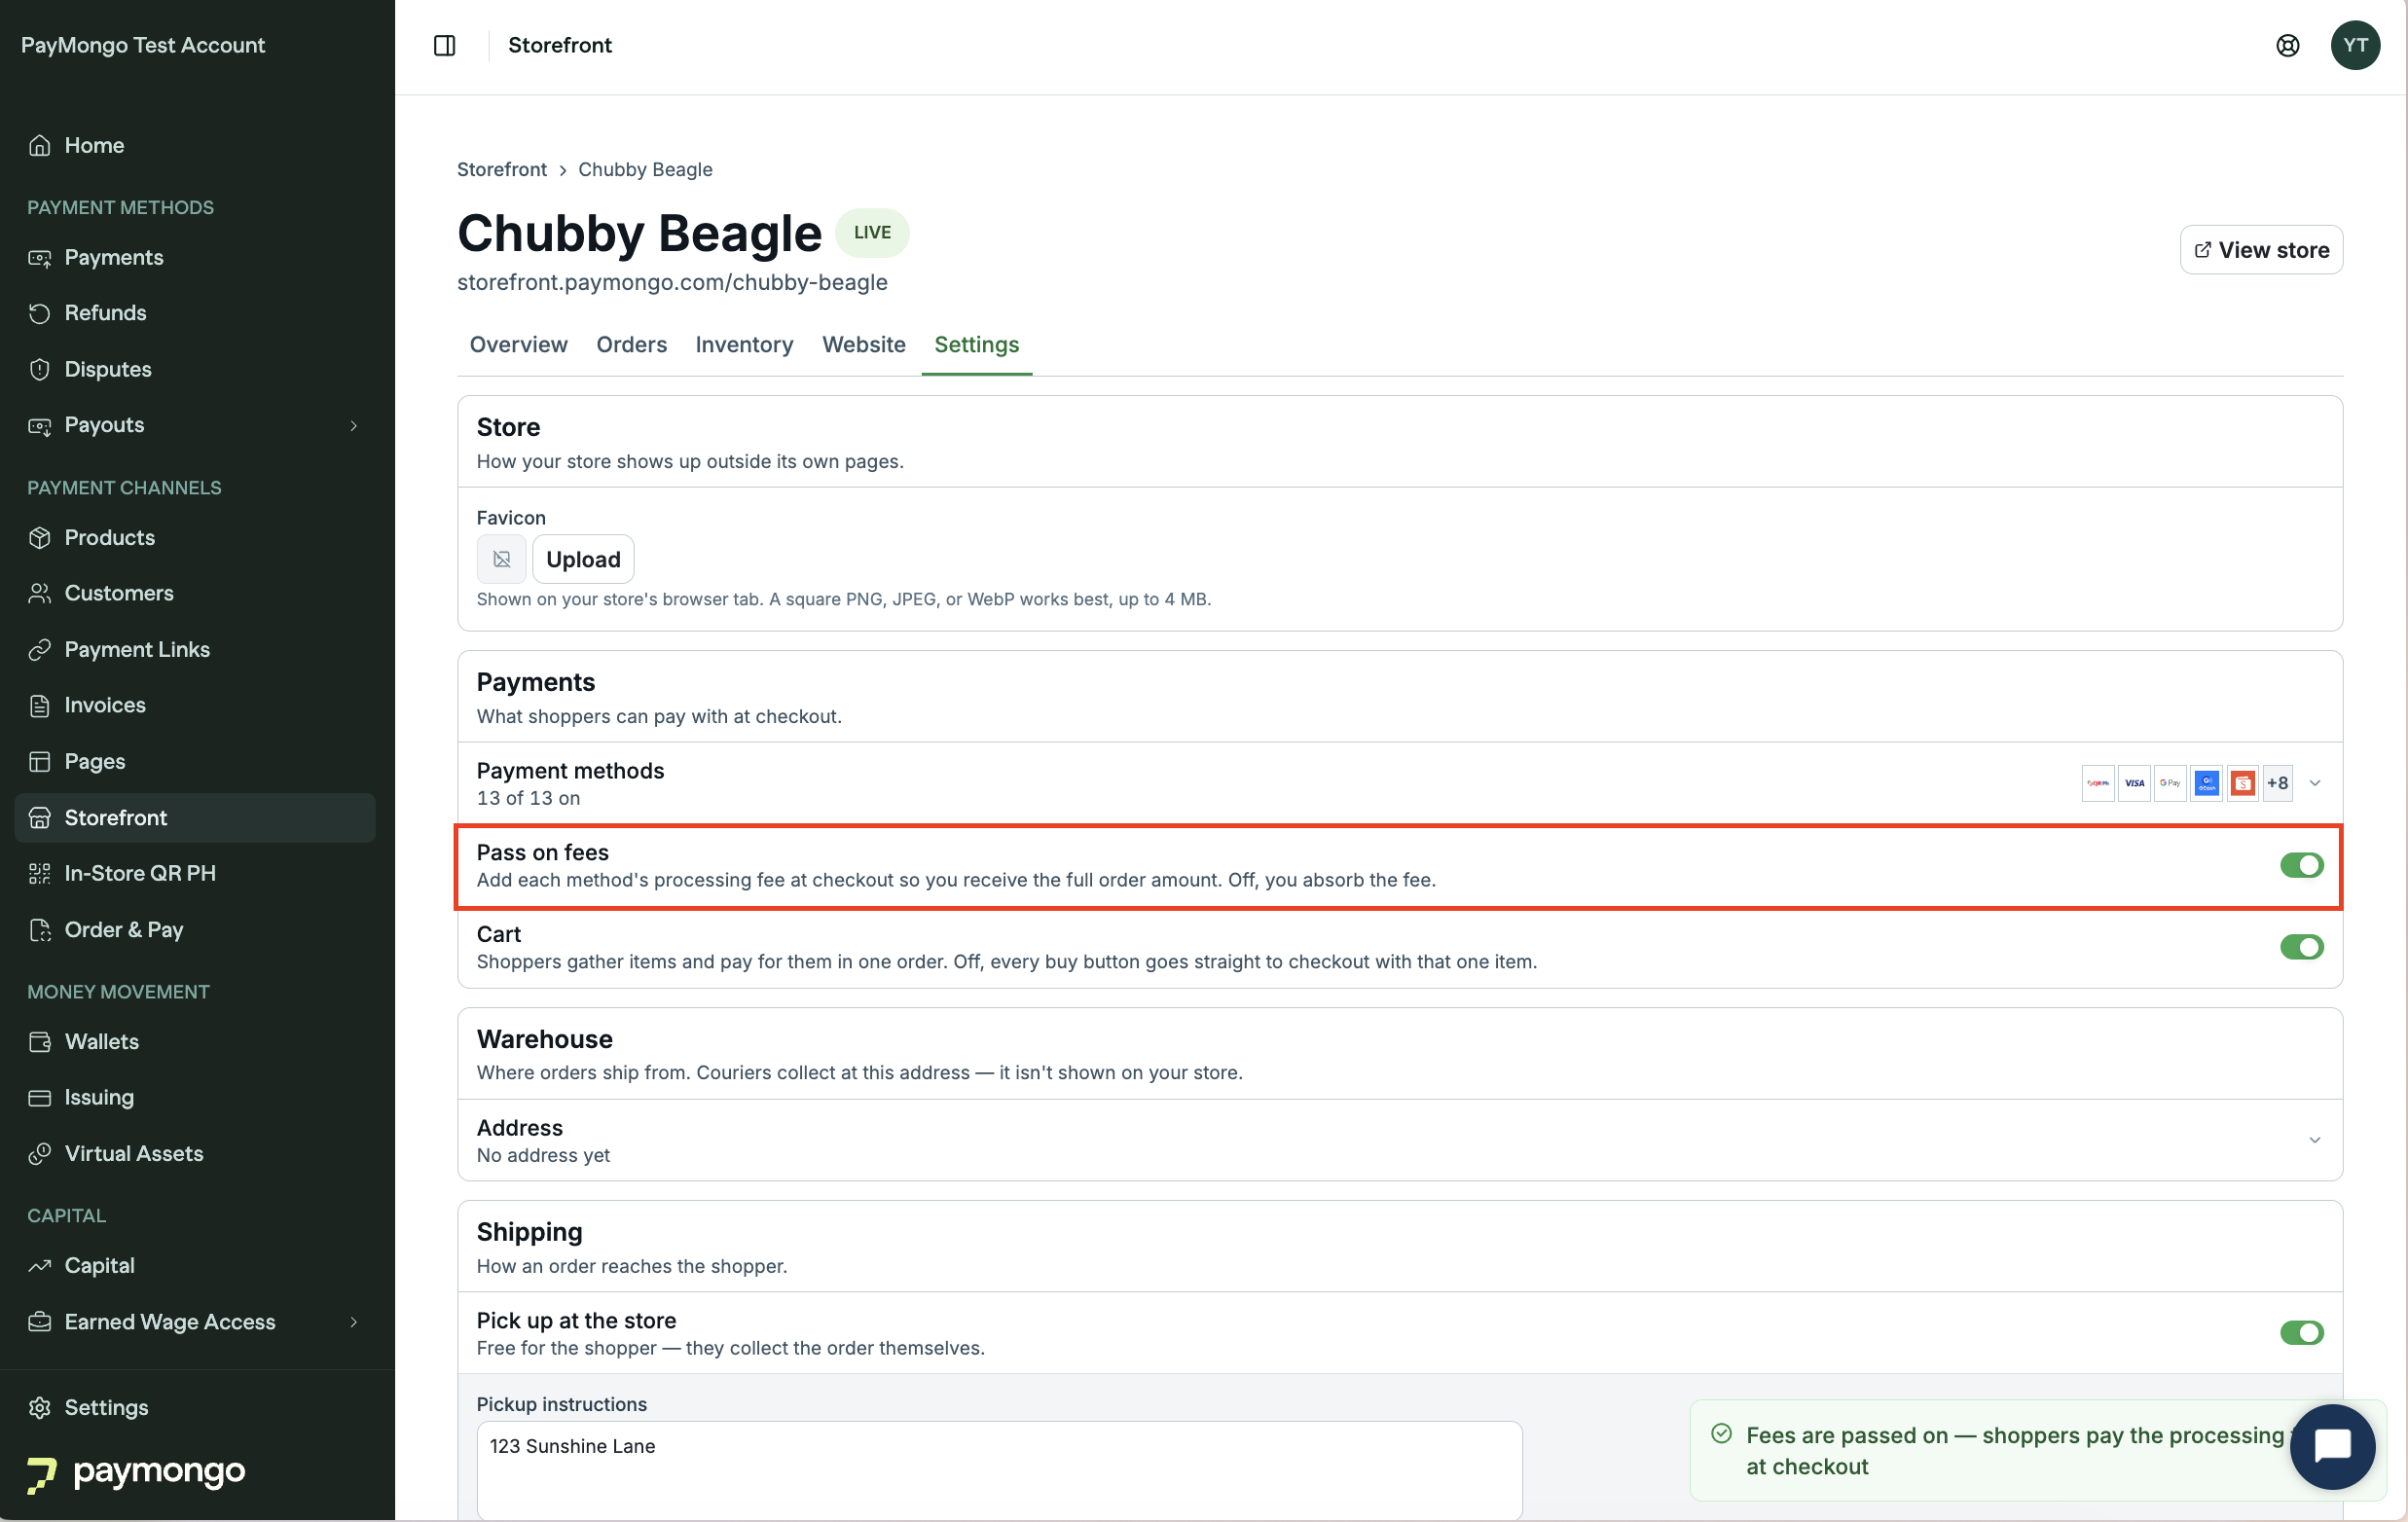
No-code channels come with a Pass on Fees toggle, no integration needed. It is available on Payment Pages, Invoices, Order & Pay, and Storefront.
On a Payment Page, open the page and turn on Pass on Fees.
On an Invoice, turn on Pass on Fees while creating the invoice.
On a Storefront, open Settings and turn on Pass on fees under Payments.
Glossary
| Term | Definition |
|---|---|
| Payment Channel | A PayMongo-hosted way to accept payments without building your own checkout UI. |
| Hosted Checkout | A low-code payment flow where your backend creates a Checkout Session and redirects the customer to PayMongo's hosted checkout page. |
| Payment Link | A no-code payment request you create from the dashboard and share with a customer. |
| Checkout Session | The object that represents one customer's attempt to pay for one order through a PayMongo payment channel. |
| Payment Page | A reusable, brandable payment page with a persistent URL and QR code. |
| E-commerce plugin | A drop-in integration that connects PayMongo payments to supported e-commerce platforms. |
| Storefront | A PayMongo-generated storefront with payments built in. |
| Invoice | A payment request created from the PayMongo Dashboard. An invoice includes customer details, a breakdown of line items, and a due date. |
| Payment method | A payment option shown to the customer at checkout, such as card, bank, or wallet-based payment methods enabled on your account. |
| Closed-loop wallet / Default wallet | A PayMongo Wallet type shown in the dashboard that can accept QR Ph payments, top up, and send funds to other PayMongo Wallets; for wallet limits and upgrade steps, see Wallets. |
| Payment Intent | An object created for each payment attempt made inside a Checkout Session. |
| Webhook | A notification PayMongo sends to your backend when a payment event happens. |
| Pass-on fees | A Checkout Session setting that adds PayMongo's transaction fee to the customer’s total instead of deducting it from the amount you receive. |
Updated about 1 month ago