
Create and Send an Invoice
Fill in the customer and line items, customize the look, preview, then email it or share the link.
-
Create an Invoice
Go to Payment Channels → Invoices in your dashboard and click + New invoice. Fill in the following:
-
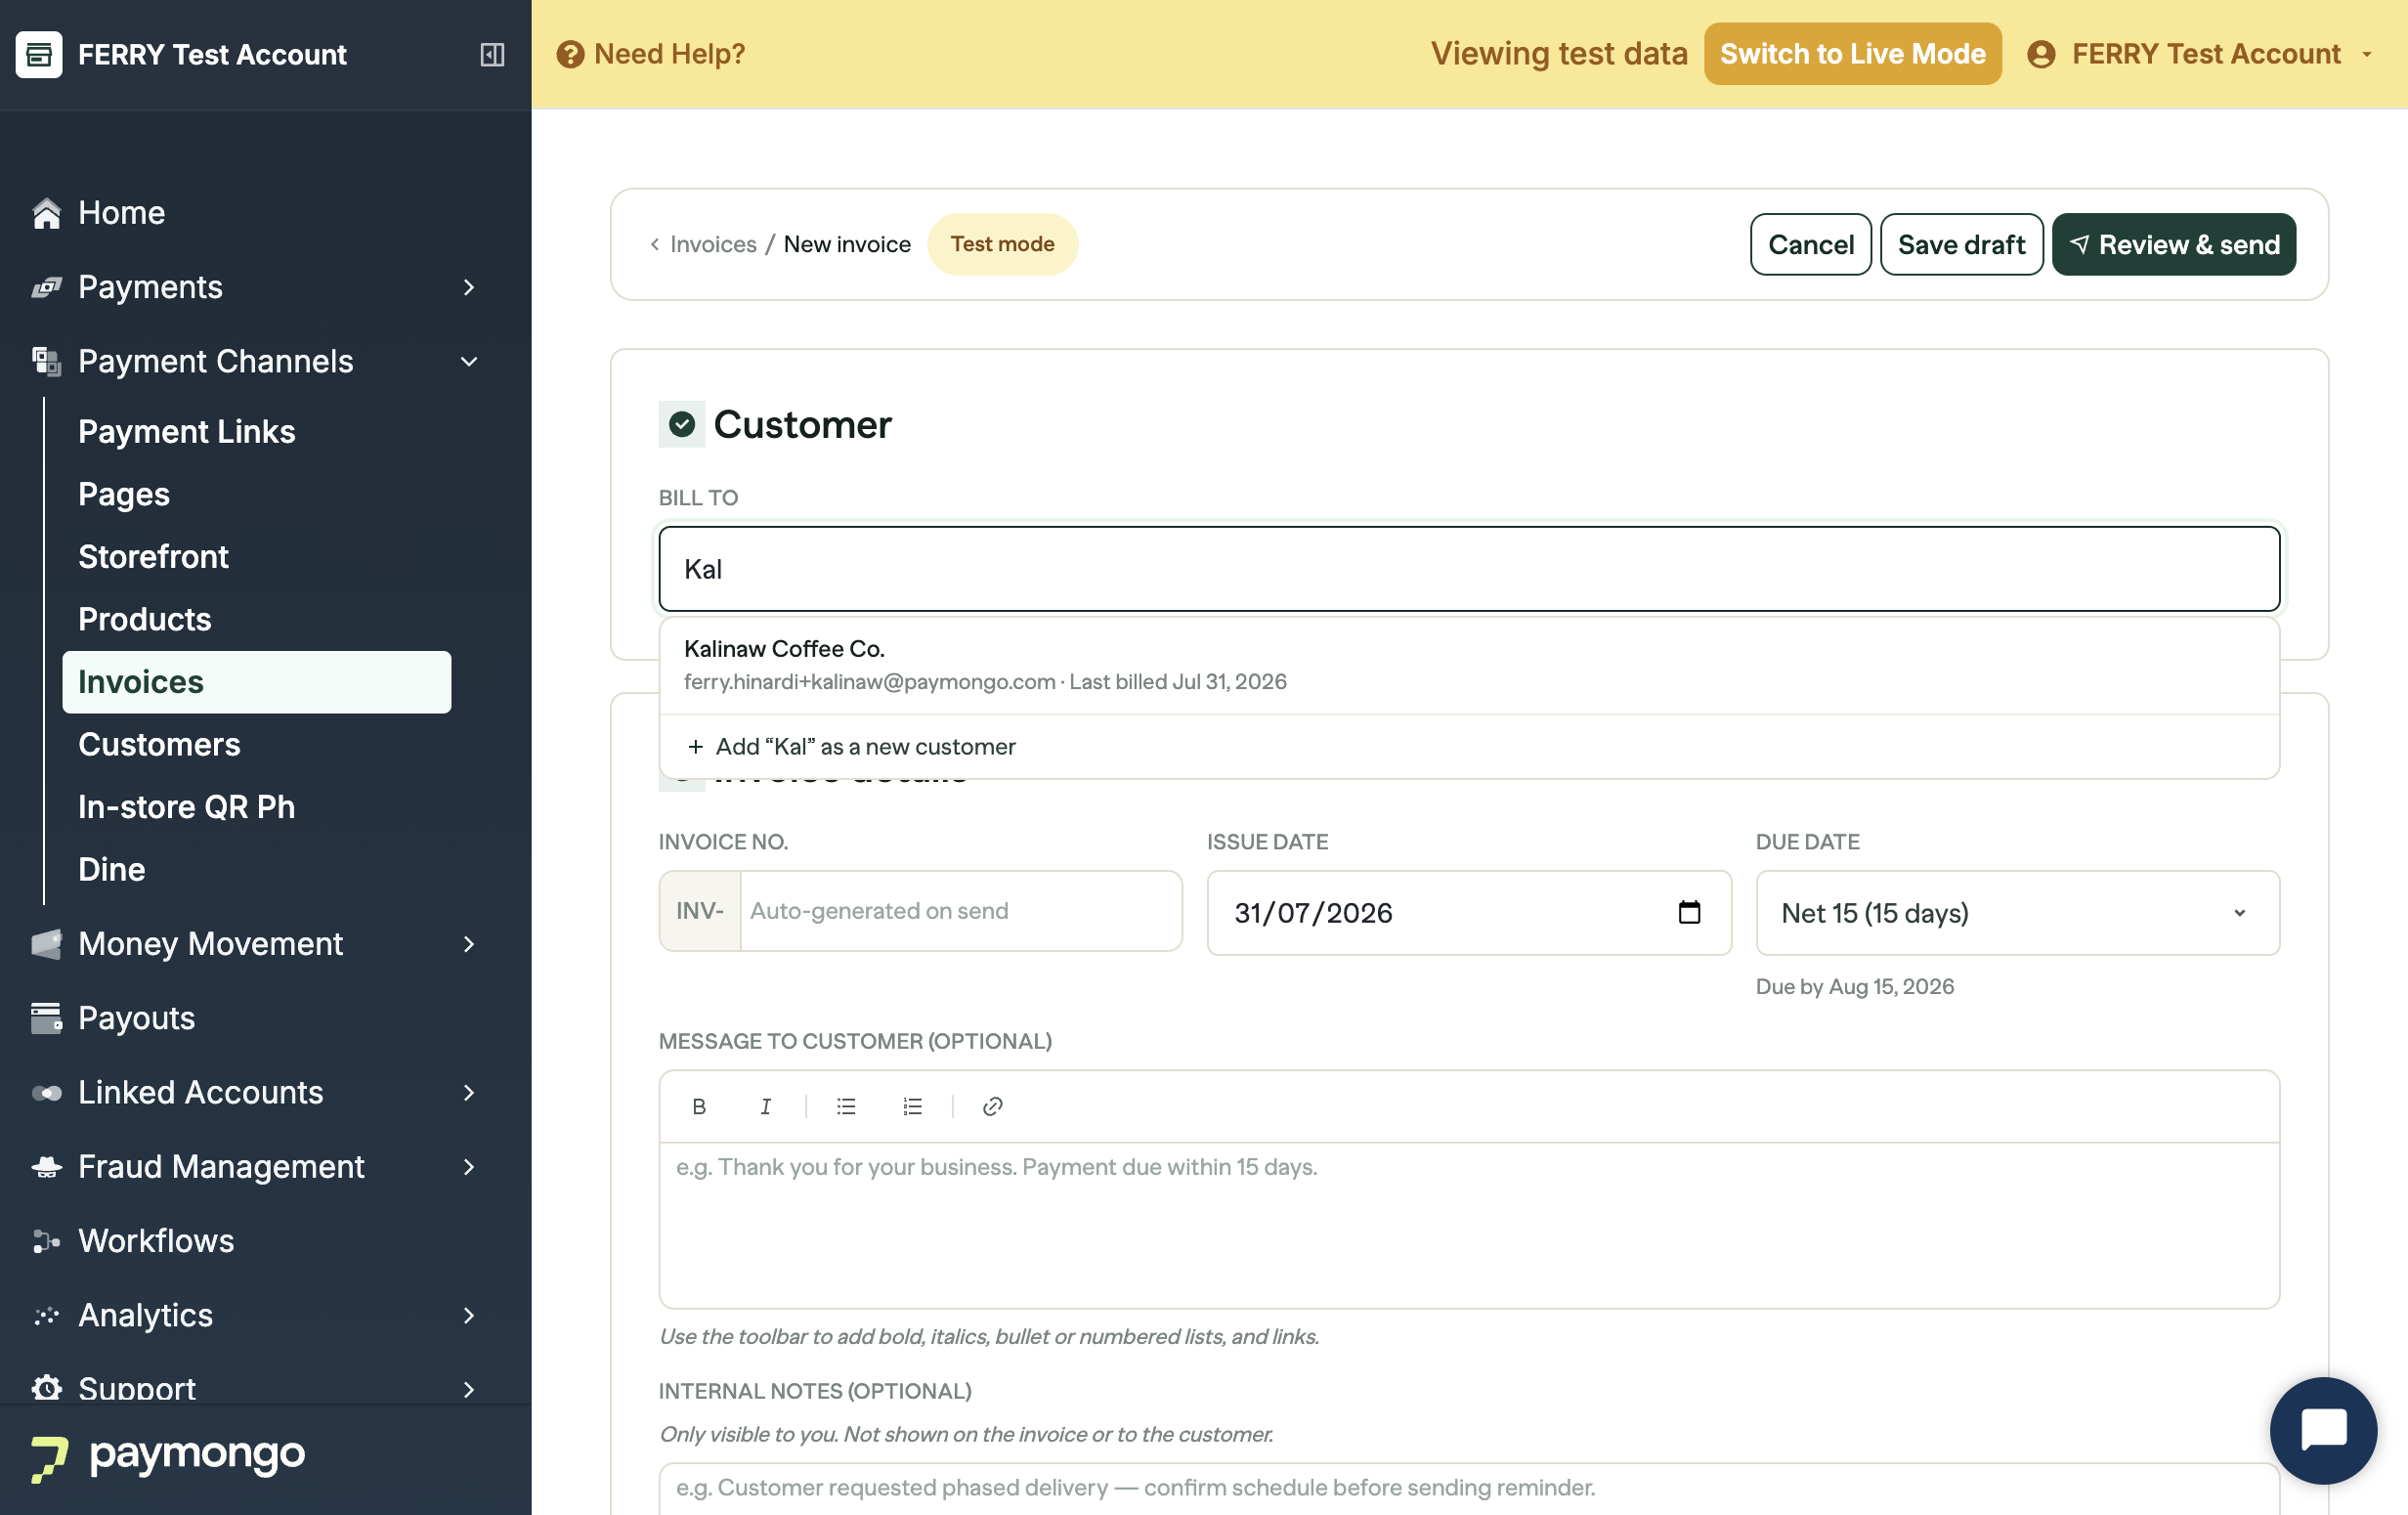
Customer details. Start typing the customer's name in BILL TO. Anyone you have billed before is
suggested with their email and when you last billed them, so you can reuse them in one click. For a new
customer, choose "Add … as a new customer" and fill in the name, email address, and optionally a mobile
number and TIN. The email address is where the invoice will be sent. -
Invoice details. Customize the invoice number, set an issue date and due date, add a message to your customer (visible on the invoice), and add internal notes (not visible to the customer).
-
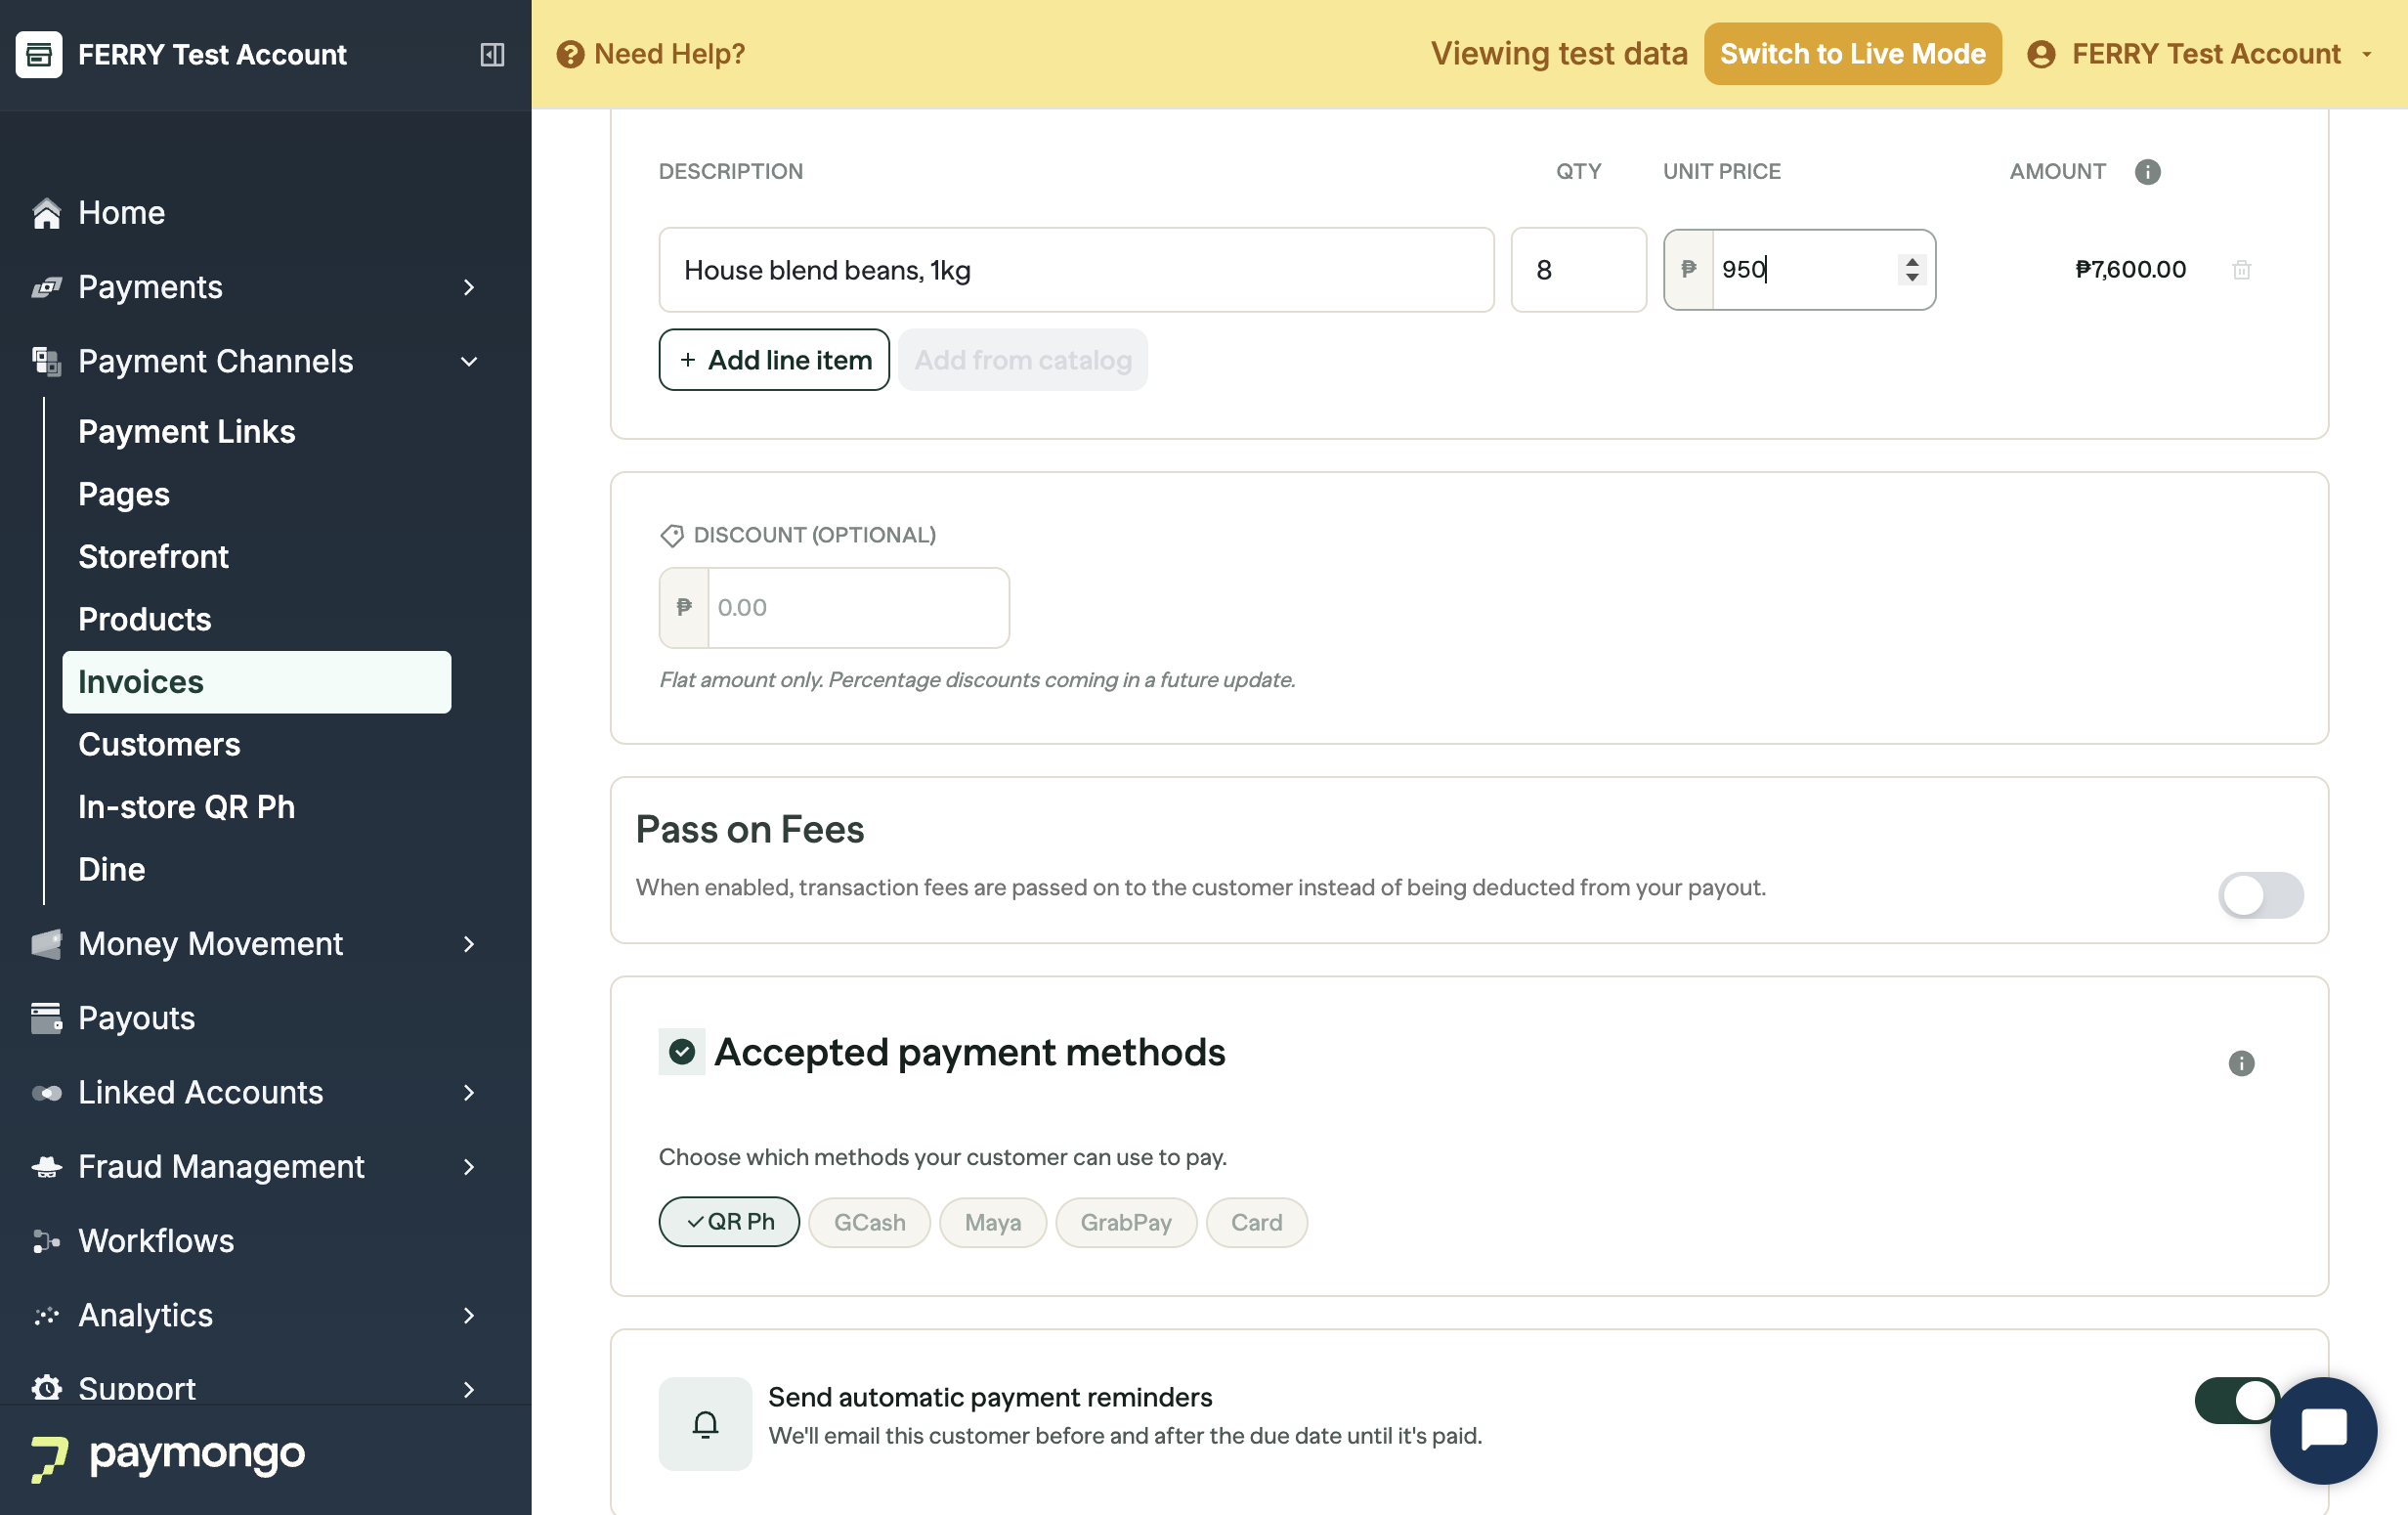
Line items. Add each product or service being billed with quantity and unit price. PayMongo calculates the totals automatically.
-
Discount. Apply a fixed-amount discount to the invoice subtotal if applicable.
-
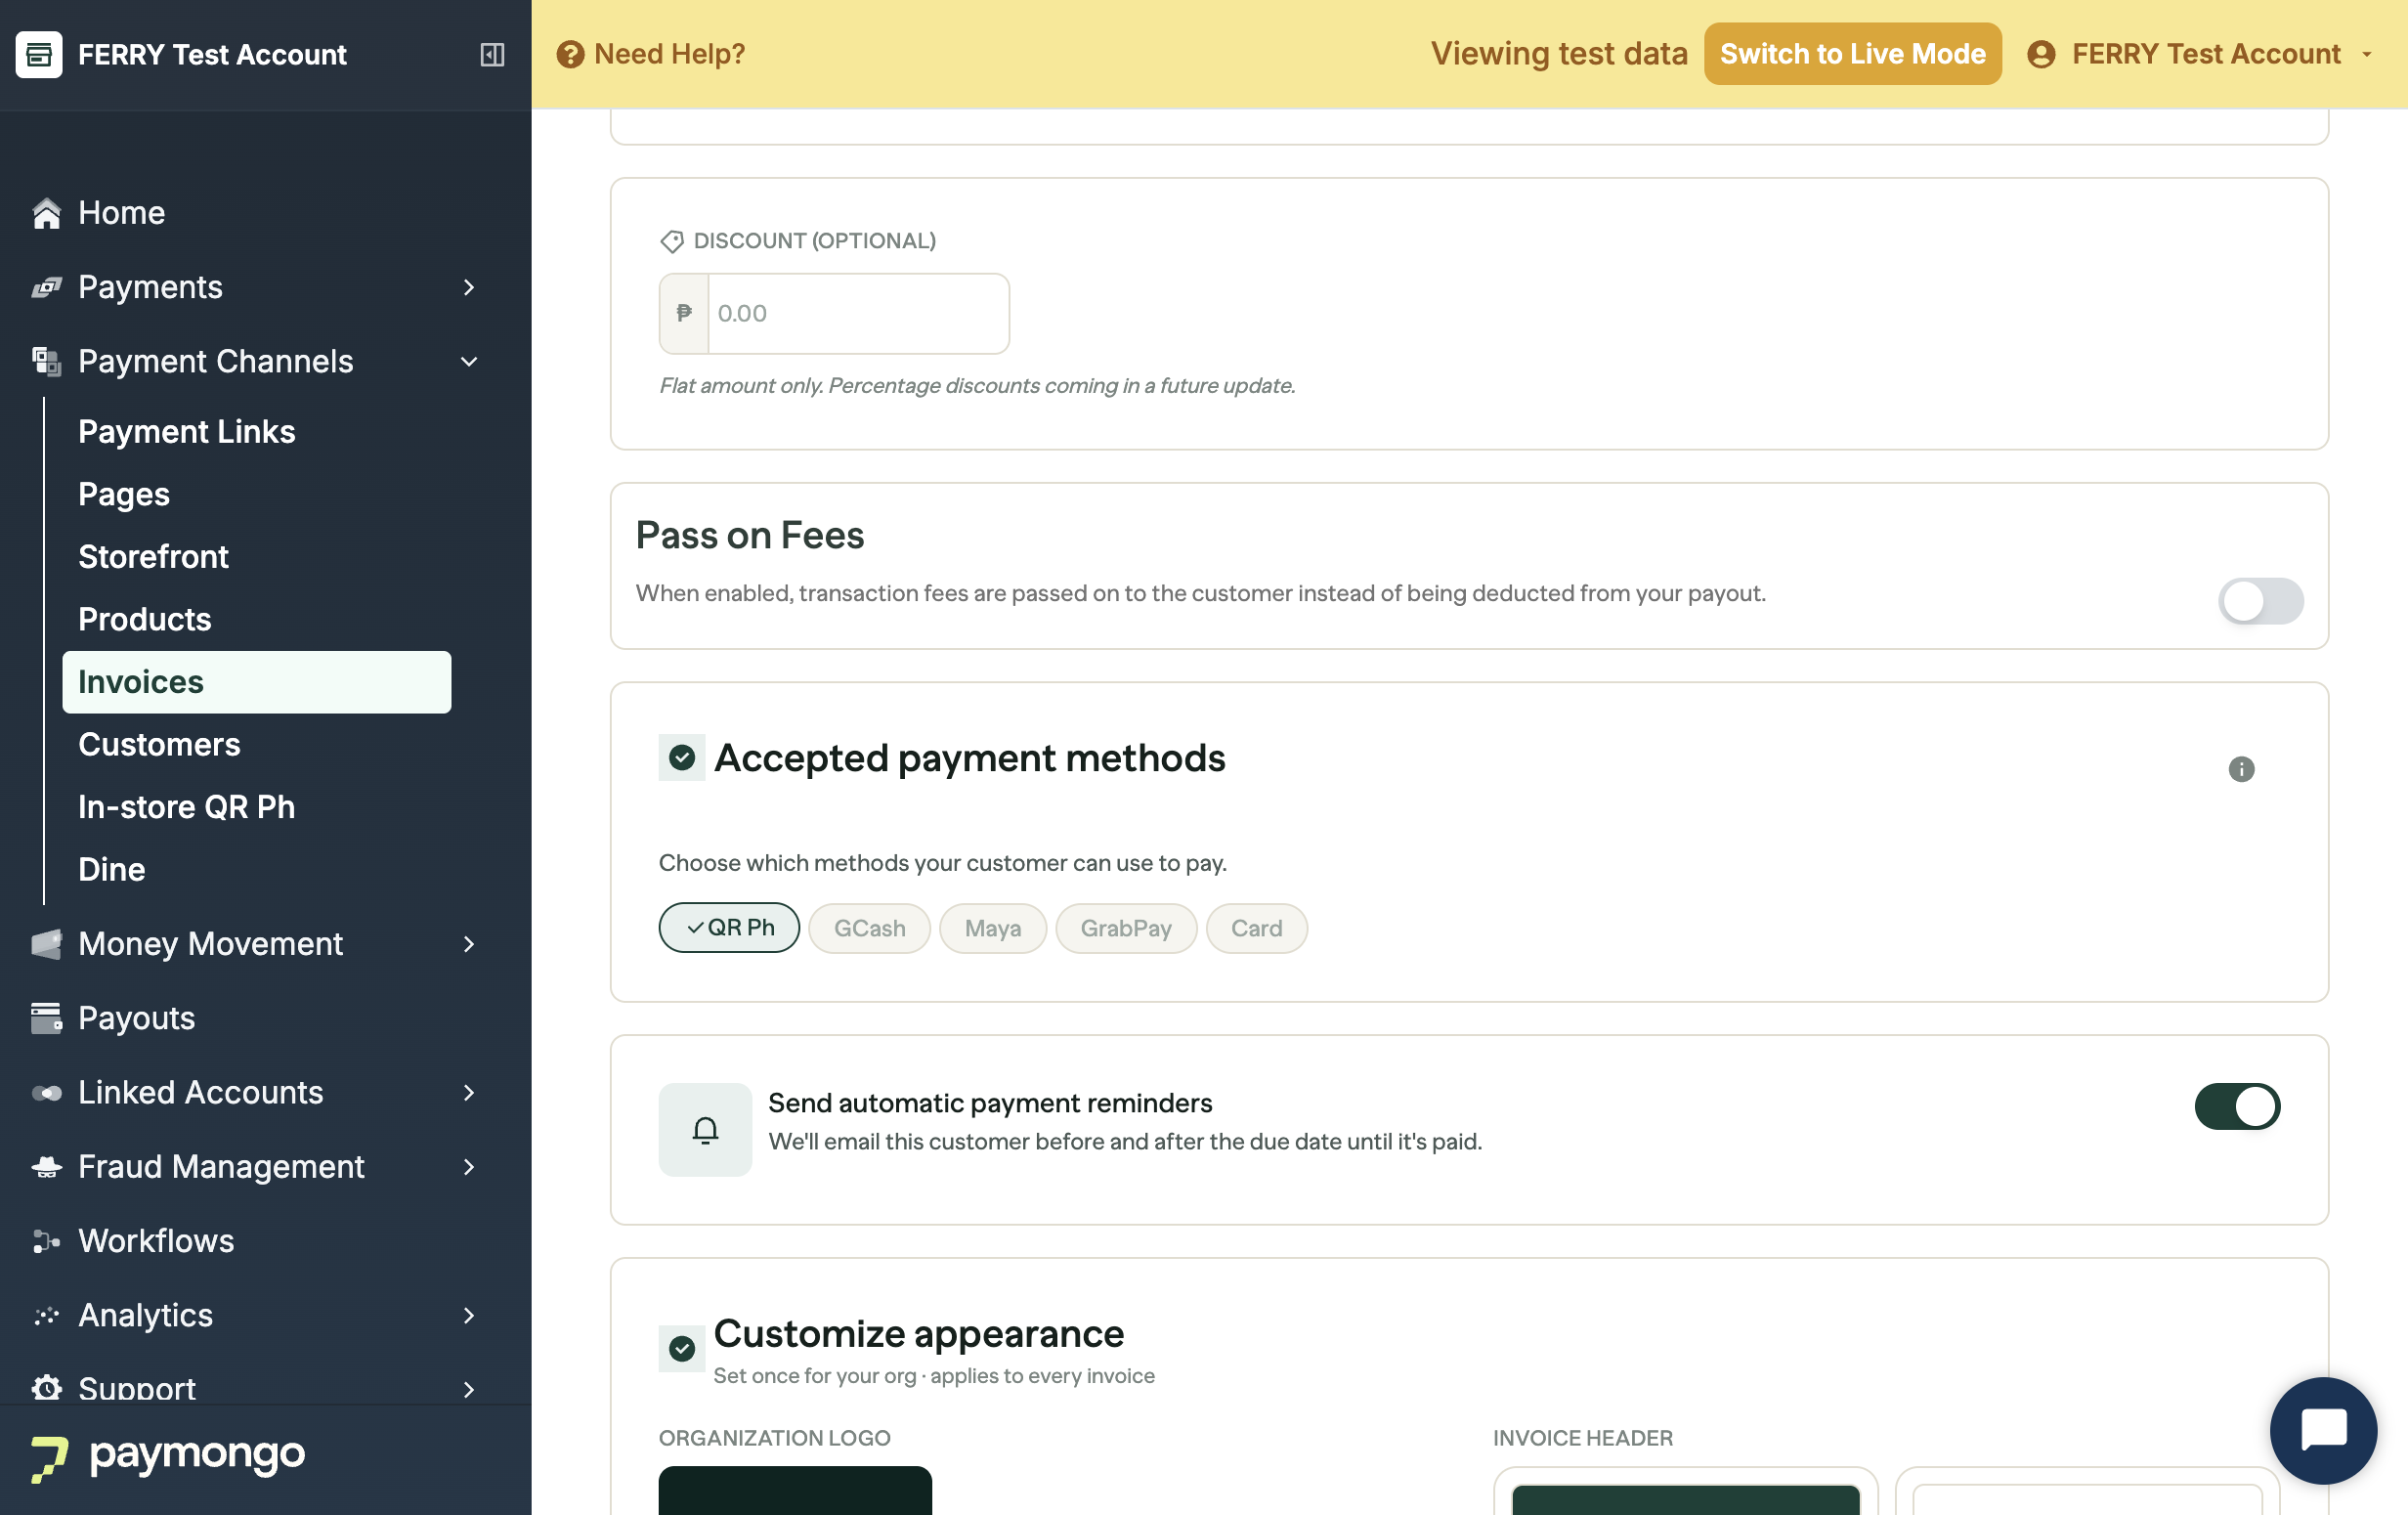
Payment methods. Toggle which payment methods your customer can use to pay. Only methods already enabled on your account will appear.
-
Pass-on fees. Optionally pass transaction fees to your customer so you receive the full invoice amount.
-
Automatic reminders. Left on, PayMongo follows up on this invoice for you until it is paid. Turn it off here if this particular customer should not be chased automatically. Reminders are not used on a repeating invoice, since each cycle emails its own invoice.
-
Repeat this invoice. Turn this on to bill the same customer on a schedule: choose how often, when it starts, and whether it ends after a set number of cycles or runs until you cancel. See repeating invoices.
-
-
Customize appearance
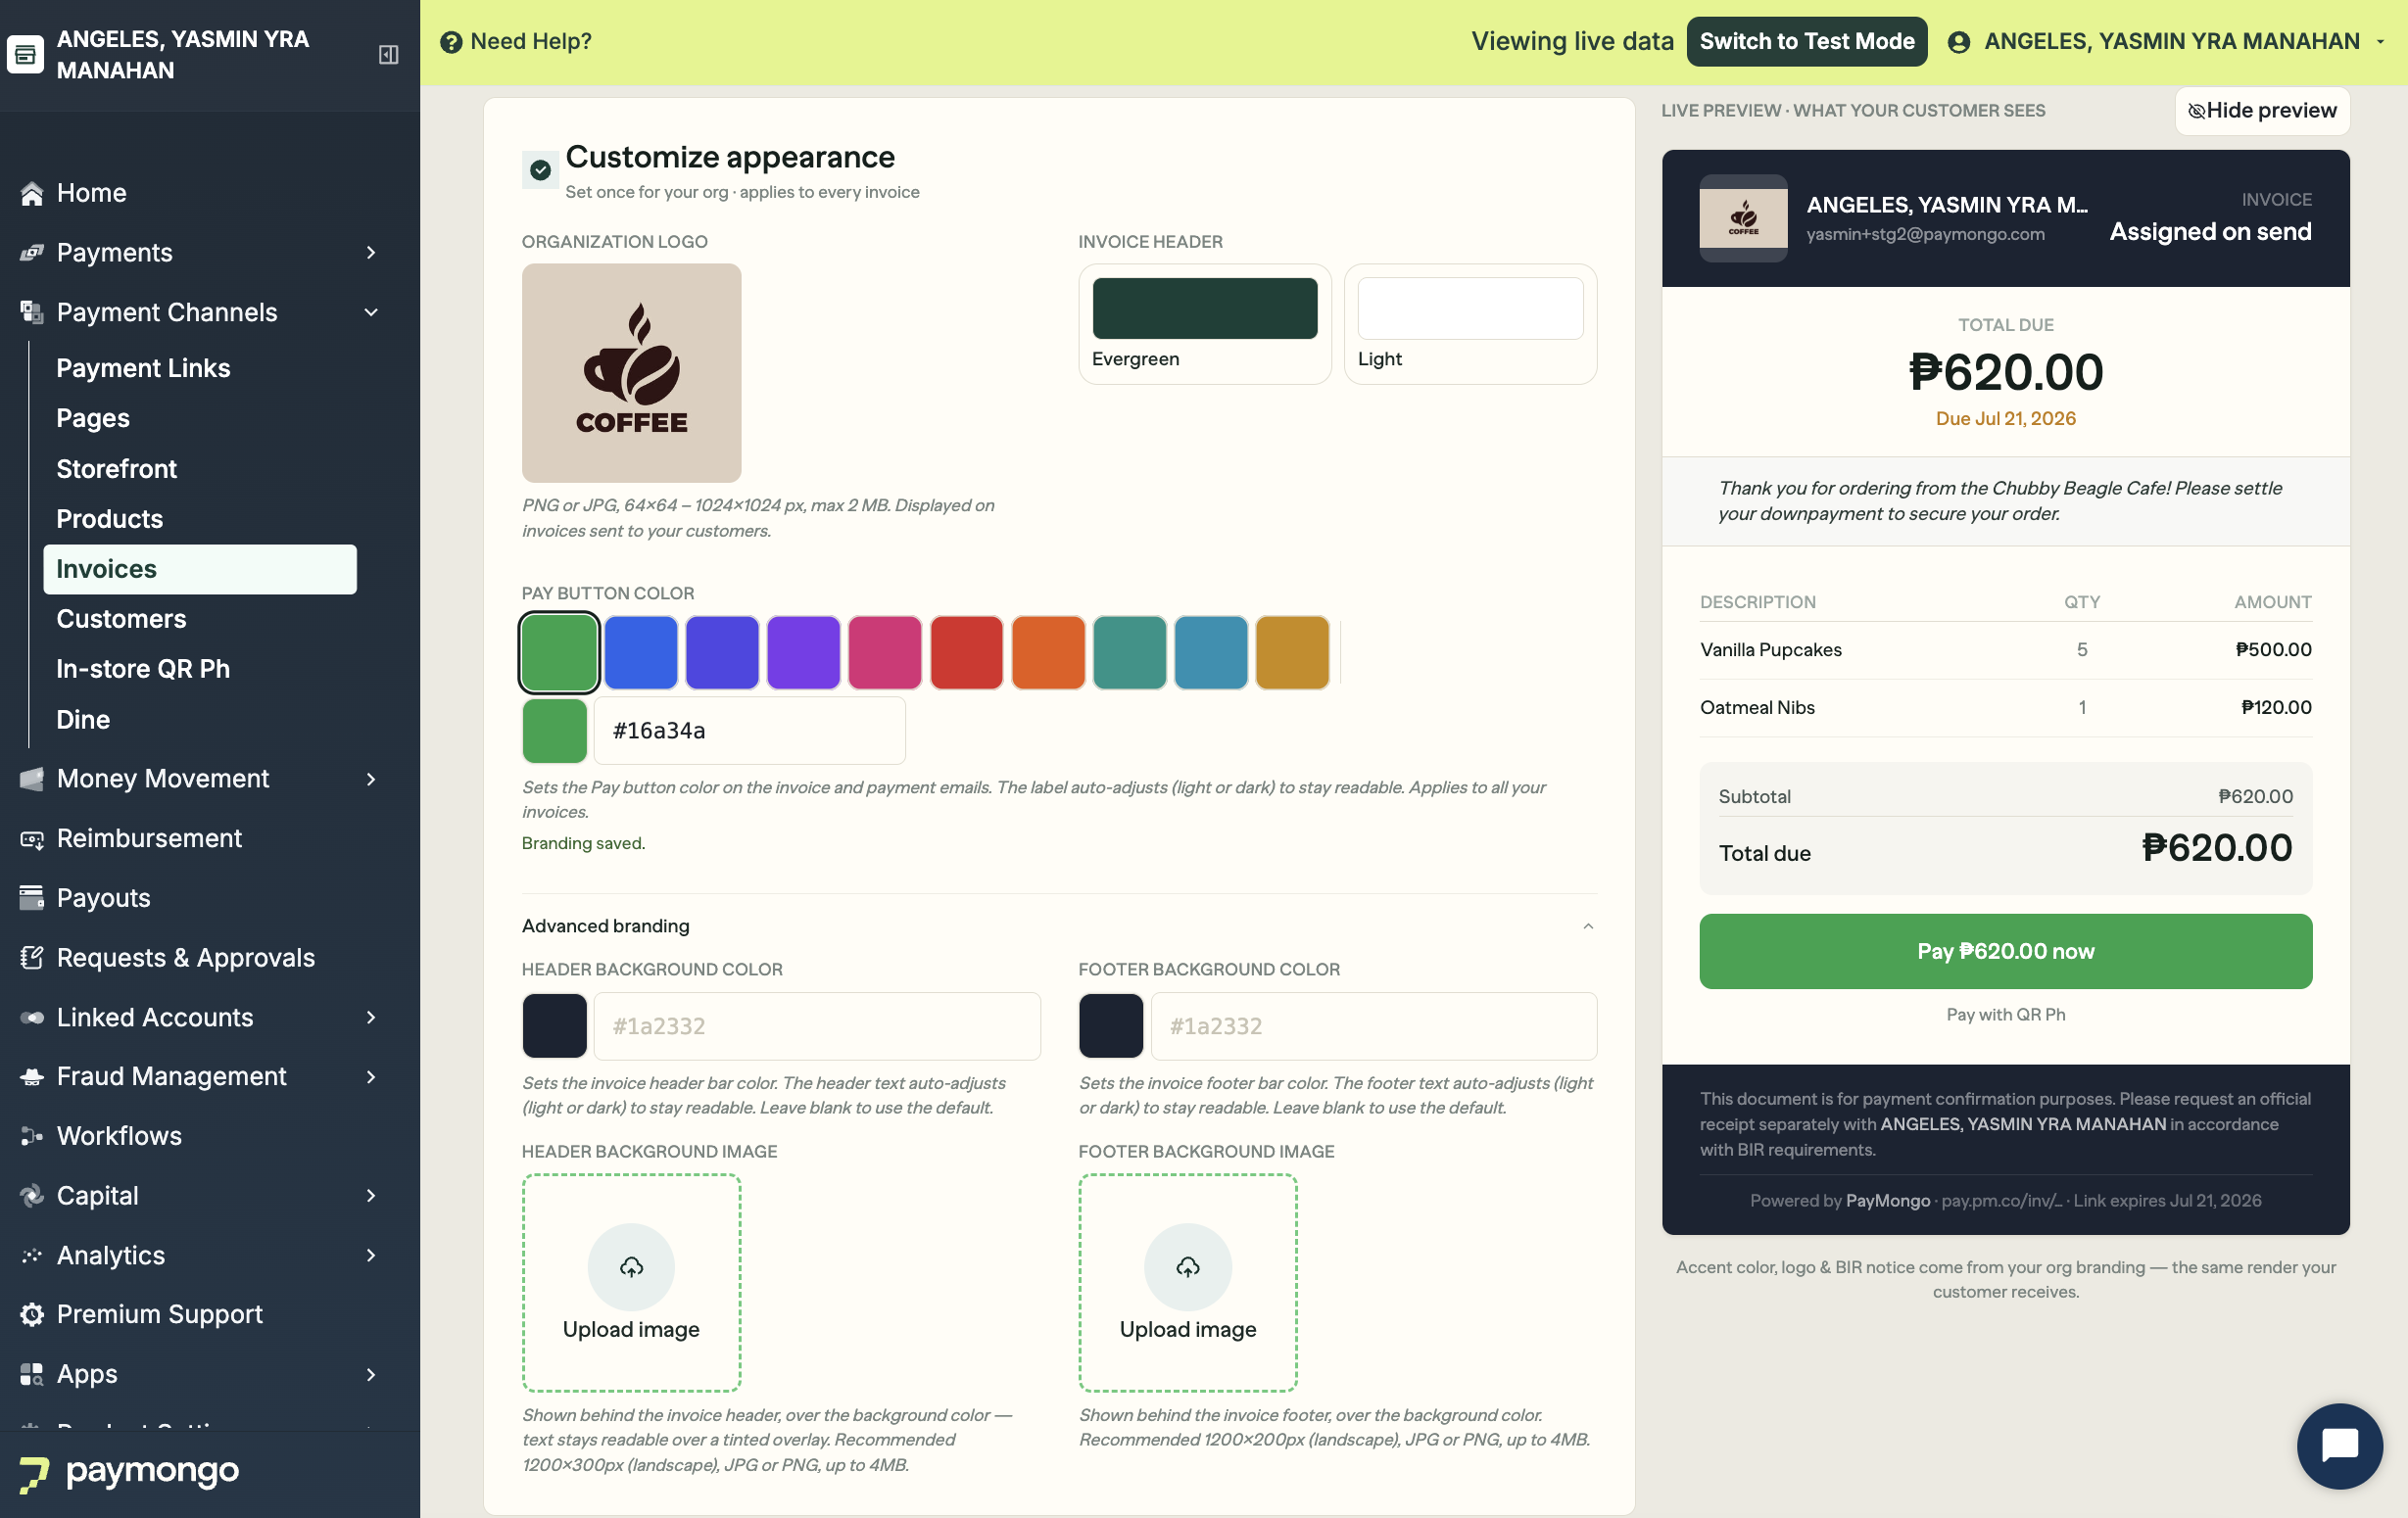
You can add your logo and customize your brand colors to the invoice so your customers recognize it as yours.
-
Preview and send
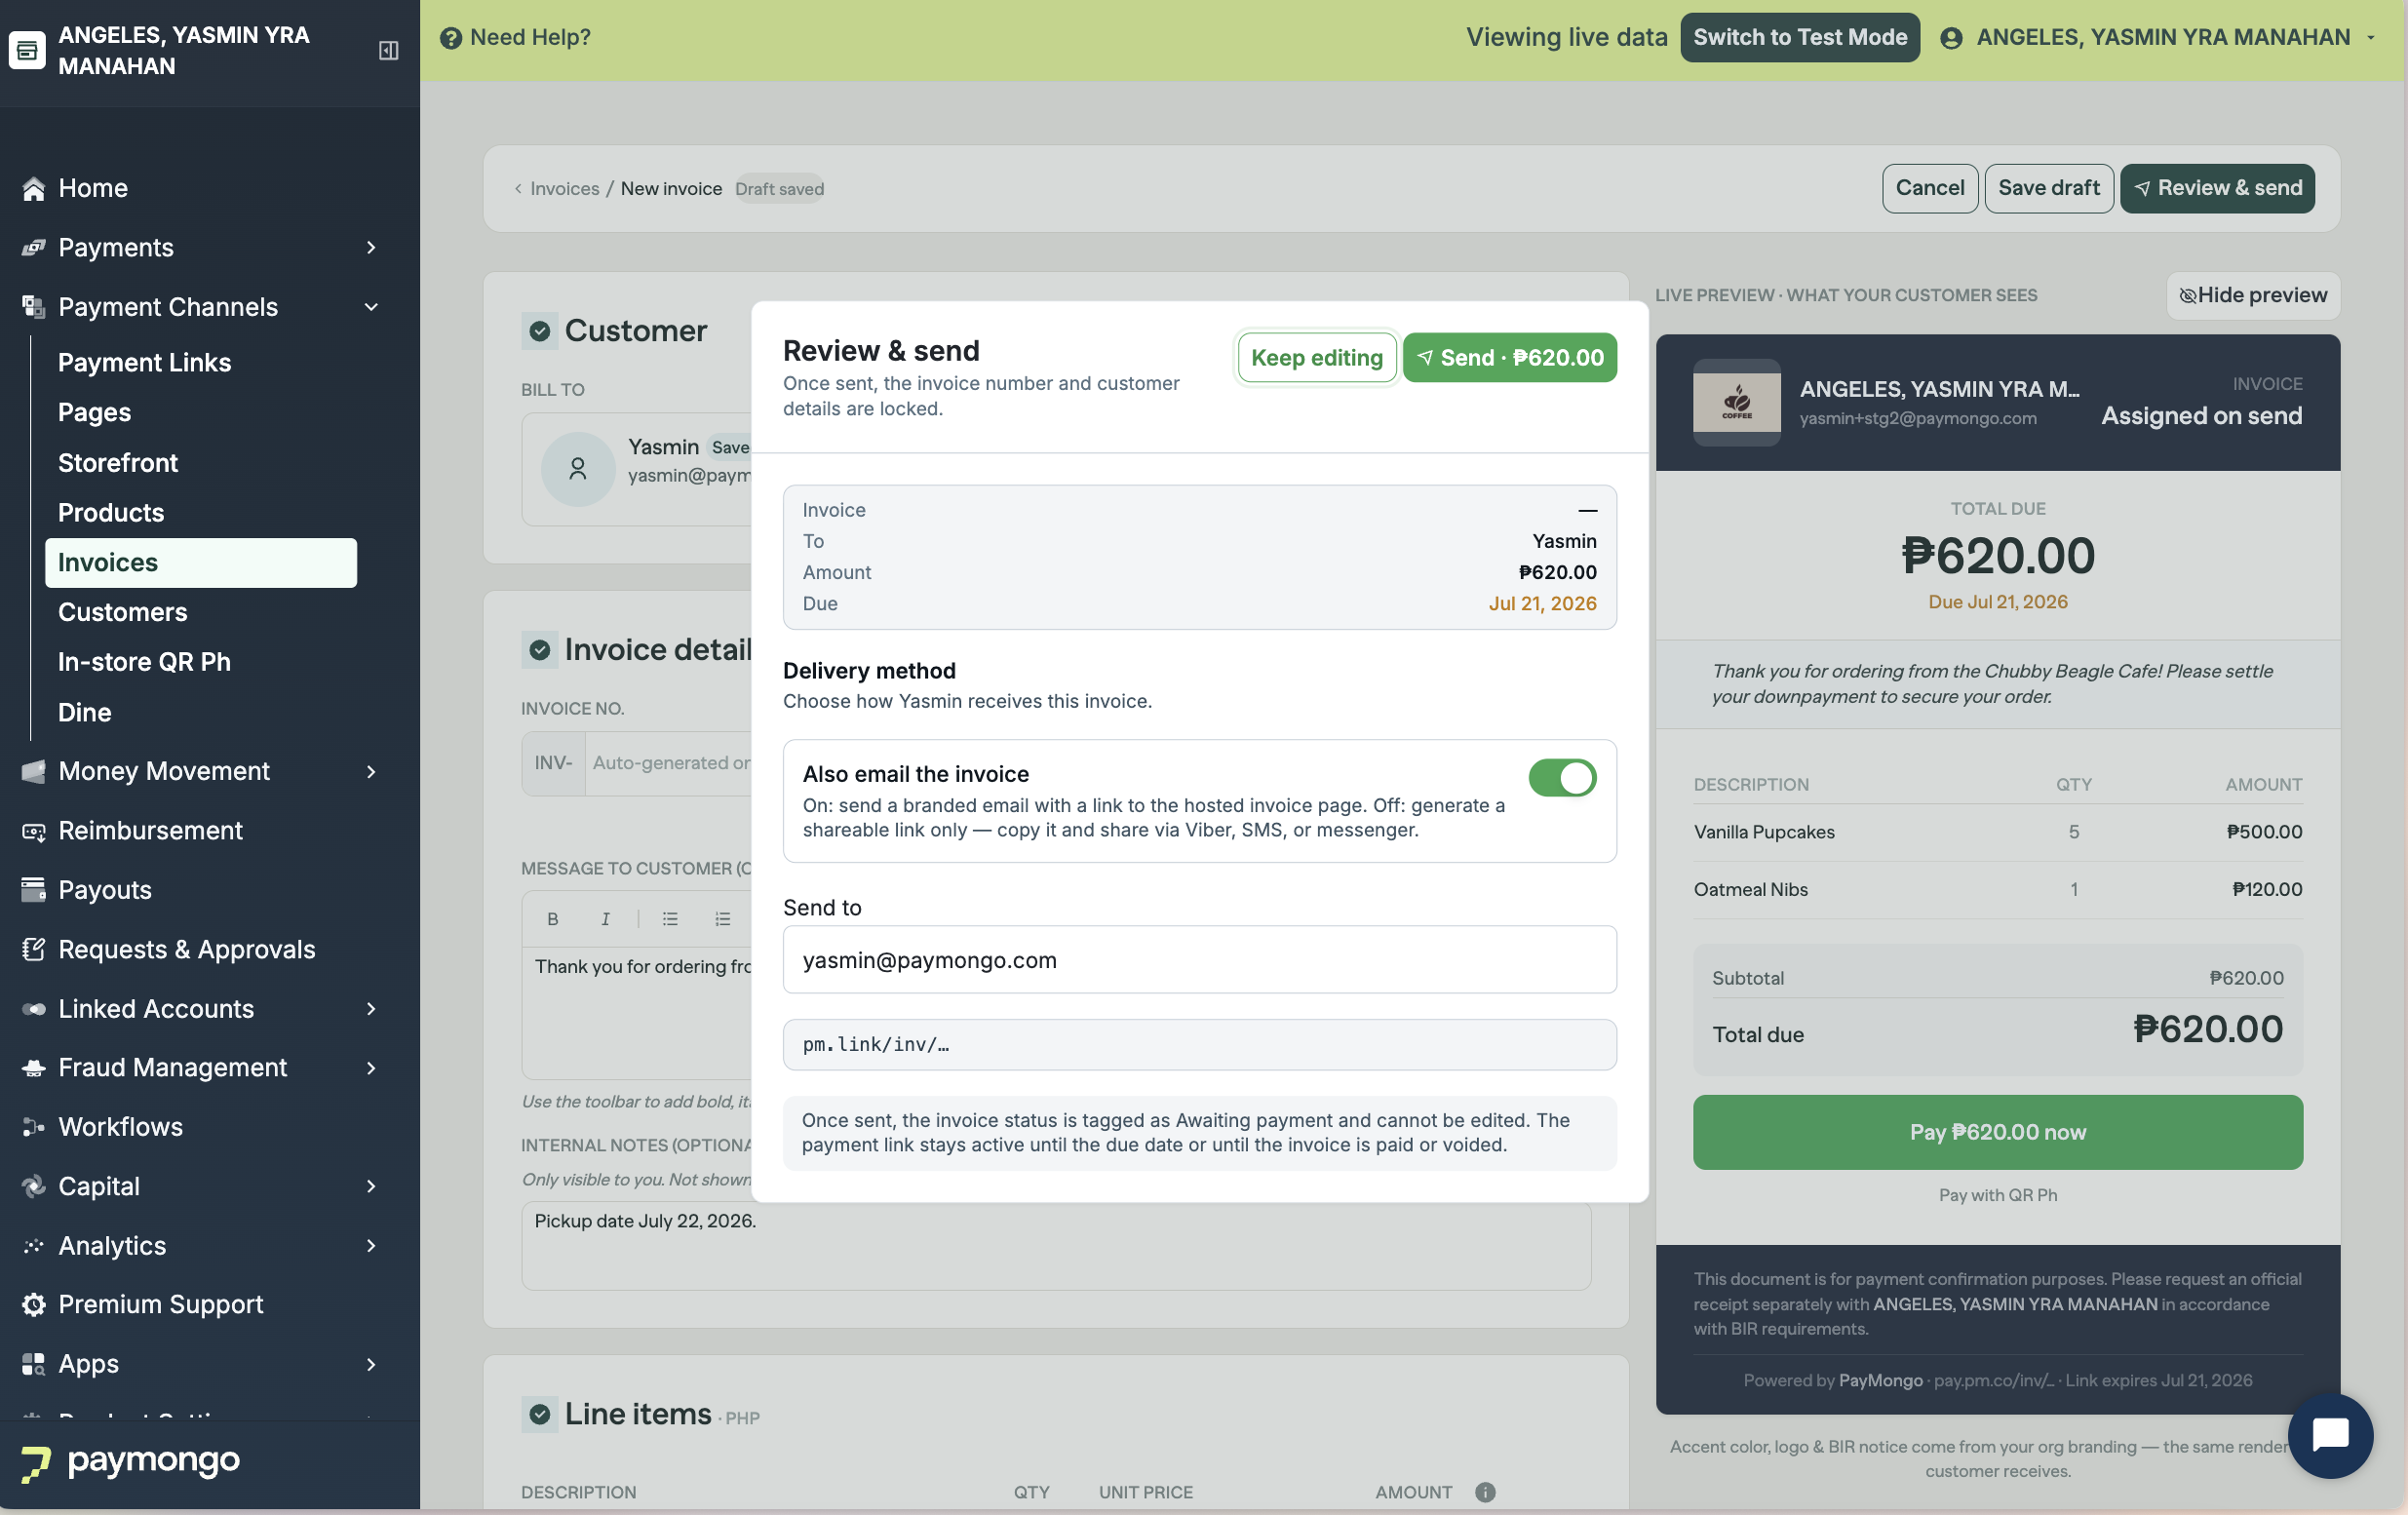
Before sending, preview the invoice to confirm how it will appear to your customer. Once ready, you can either:
-
Send via email. PayMongo sends the invoice to the customer's email address with a link to the payment page.
-
Share the link. Copy the invoice link and share it through any channel you use with your customer.
-
Schedule it for later. Pick a send date and PayMongo sends it that day, creating the payment link and emailing your customer exactly as if you pressed Send yourself. It stays an editable draft until then, and you can reschedule or cancel any time before it goes.
-
-
Track payment
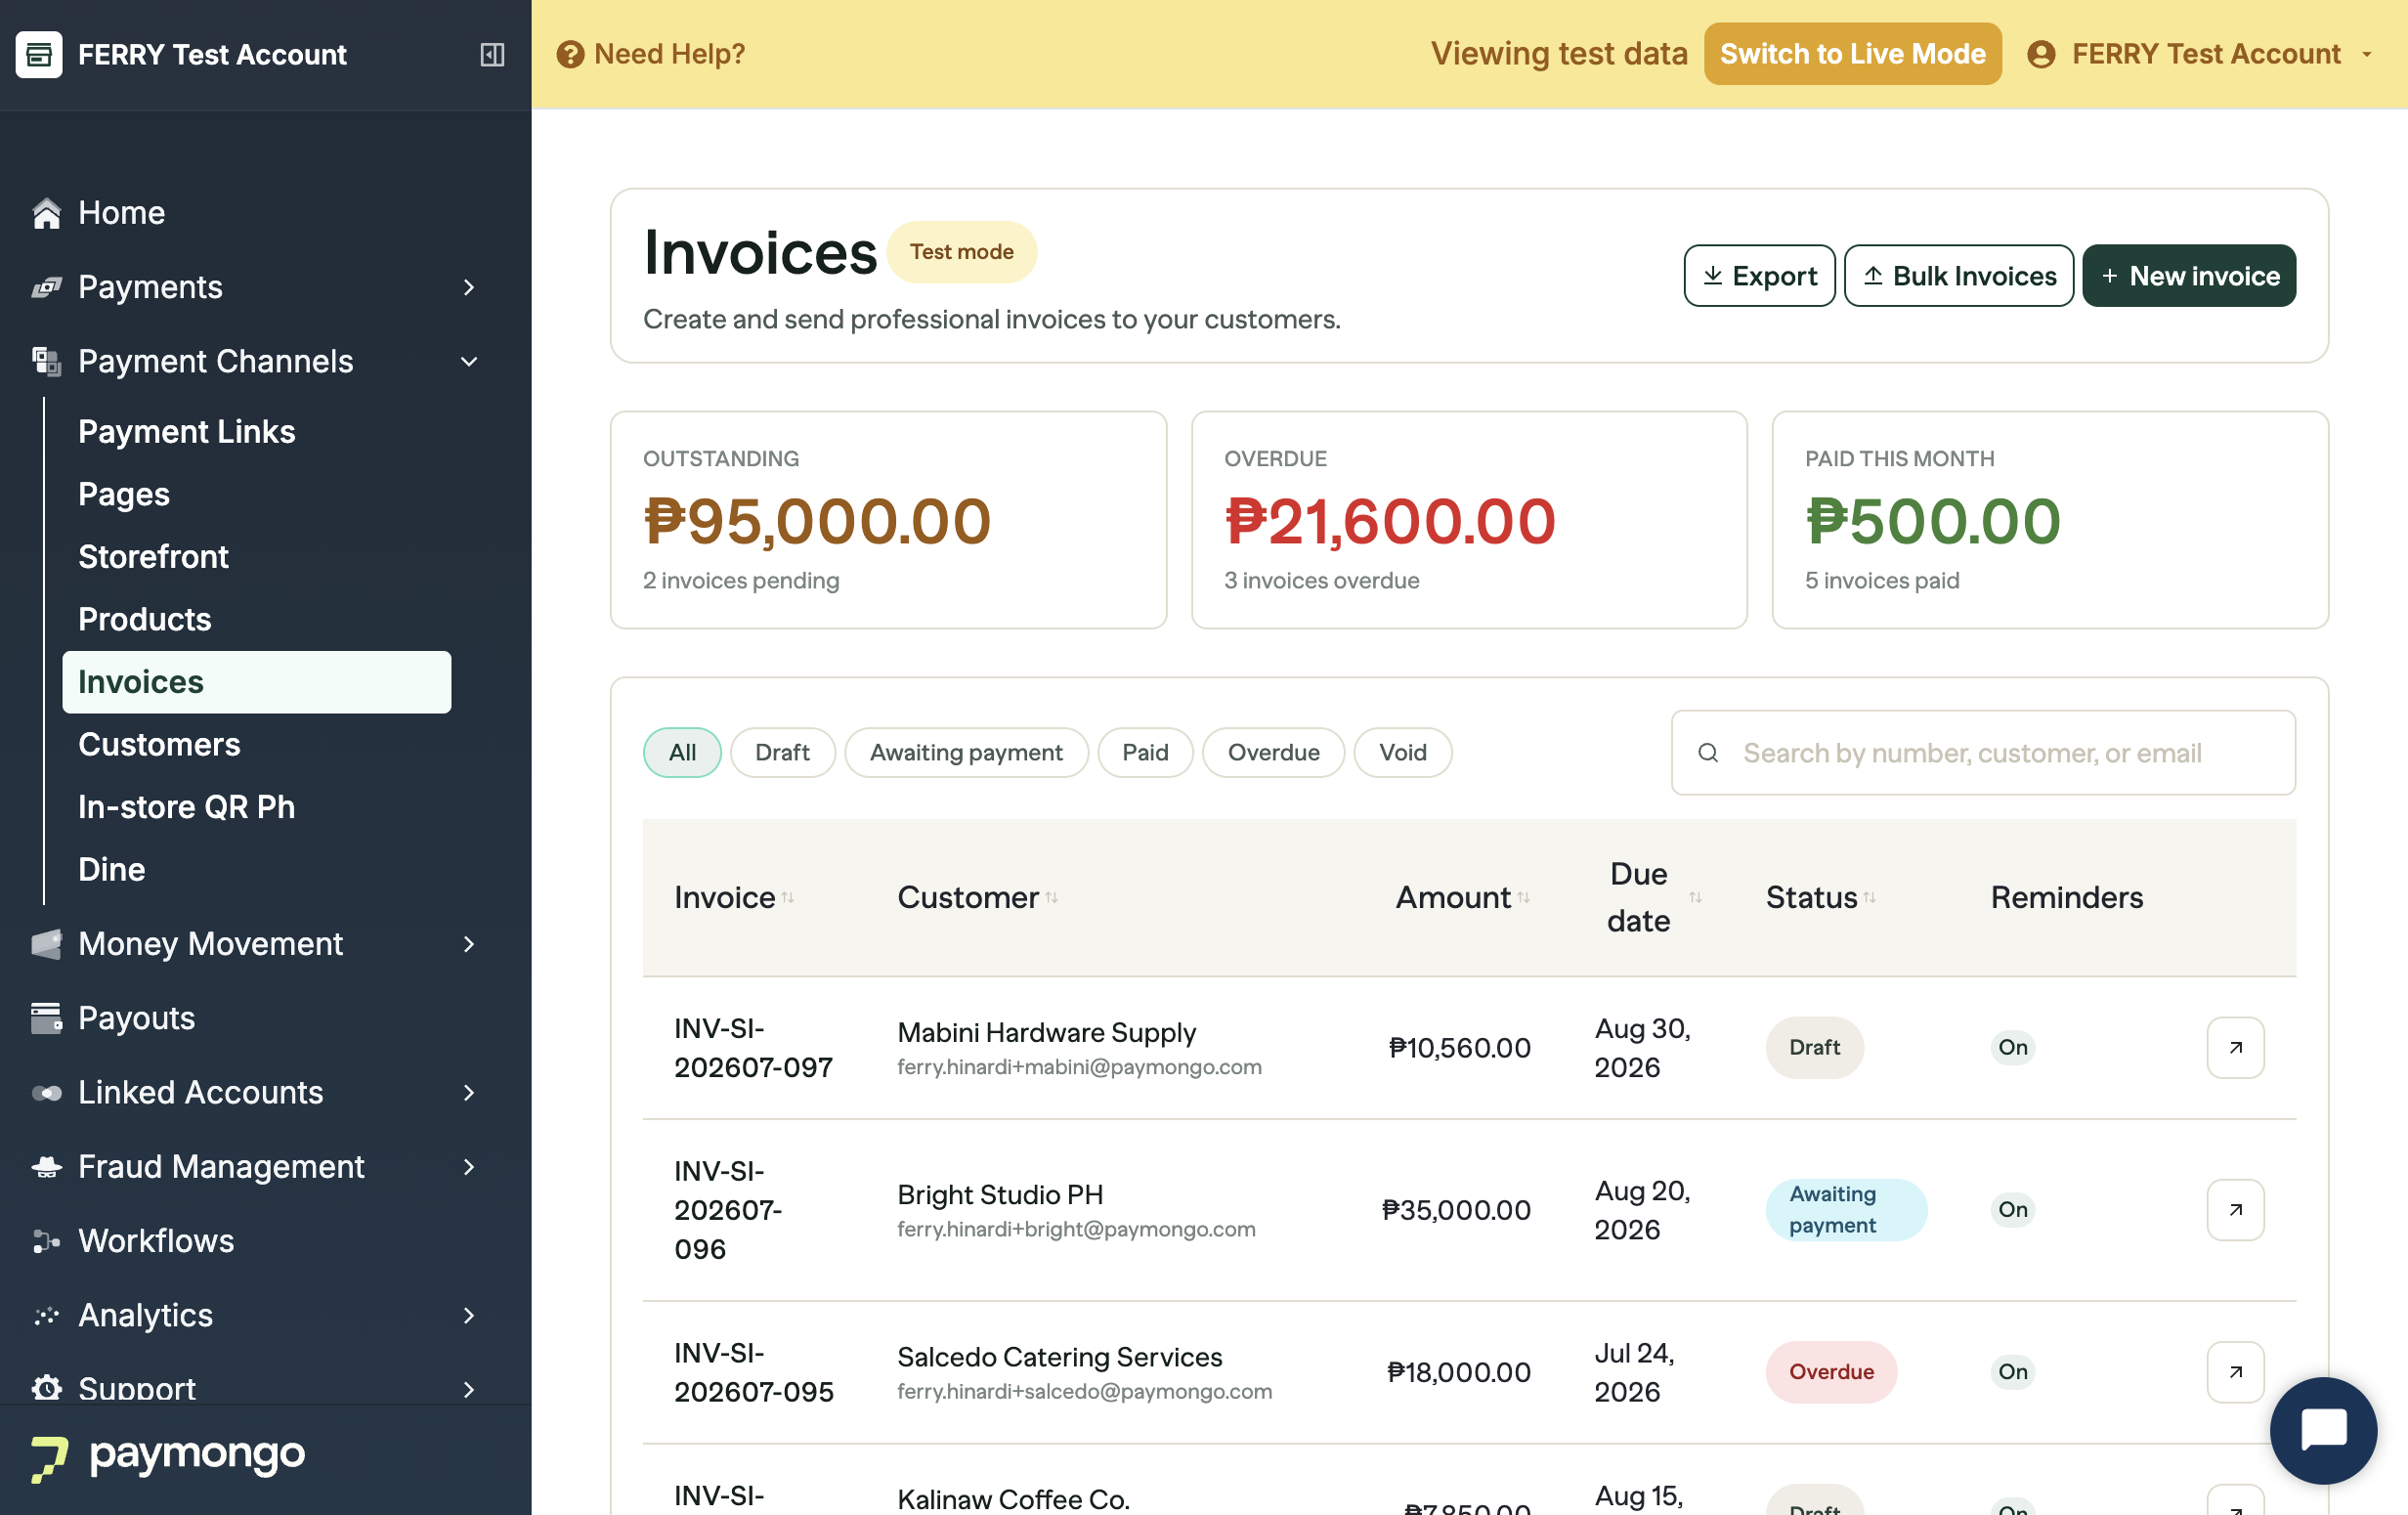
Monitor all invoices from Payment Channels → Invoices. Statuses update on their own, and a completed payment is recorded in your dashboard with a confirmation emailed to your customer. See manage sent invoices for filtering, exporting, voiding, and permissions.
Updated about 1 month ago